DIY Pencil Treat Bags
Make these easy Pencil Treat Bags with layered snacks for a fun back-to-school treat. Perfect as an after-school snack or a cute teacher gift, they’re quick to put together and customizable.
Servings: 1 treat bag
Cost: $1.70
Equipment
- Scissors
Ingredients
- 9 pieces Pink Starbursts
- 7 pieces Hershey kisses
- ⅓ cup Goldfish Crackers
- 4 mini marshmallows
- ½ tsp Mini chocolate chips
- 1 Cone-Shaped Treat Bag 9.8” by 5.1”
- 1 strip Pink Curling Ribbon 12-Inch
Instructions
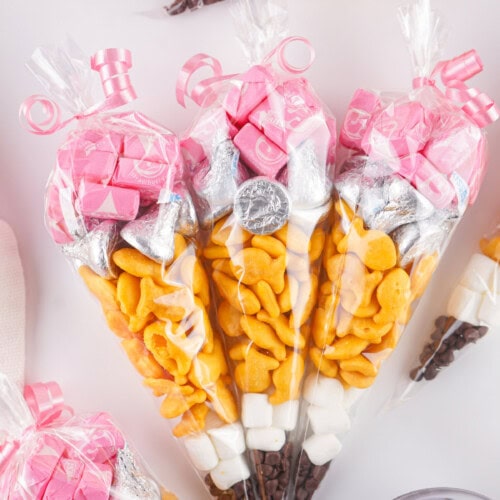
- Place the mini chocolate chips in the cone-shaped treat bag and give it a good shake to help them settle into the tip.1 Cone-Shaped Treat Bag, ½ tsp Mini chocolate chips
- Add the mini marshmallows, followed by the Goldfish crackers. Shake again to fill any gaps.4 mini marshmallows, ⅓ cup Goldfish Crackers
- Add the chocolate kisses, and finish by adding the pink Starbursts.7 pieces Hershey kisses, 9 pieces Pink Starbursts
- Bunch the top of the treat bag and tie it with the pink curling ribbon. Use a double knot instead of a bow.1 strip Pink Curling Ribbon
- Curl the ribbon ends using scissors. Enjoy!
Notes
- Store in a cool spot for up to 1 week to keep snacks fresh.
- If using larger treat bags, you'll need more ingredients or will have a larger tail. (Smaller bags look better)
- Curl ribbon after tying for the best results.
- Any ribbon can be used, but curling ribbon works best for this method.