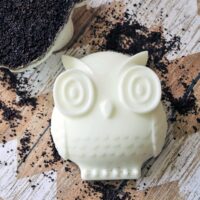
Coffee Soap with Cardamom and Lime
A great gift idea for coffee lovers, this refreshing coffee soap with cardamom and lime is exfoliating and adorable. Owl shape is optional, but encouraged. ;)
Servings: 6 bars
Equipment
- Sharp knife
Ingredients
- 4 squares shea butter soap in the suspension formula
- 1.5 tbsp sweet almond oil or jojoba oil
- 12 drops cardamom essential oil
- 8 drops lime essential oil
- 8 drops coffee essential oil optional
- 1 tbsp coffee grounds
Instructions
- Cut the soap into the amount of squares you need. They are pre-scored already in the package and fairly easy to cut with a sharp knife. I like to lay them on the molds to help me guesstimate how many I need each time because I use several sizes of the molds and each is a little different. It is better to add one more than you think you will need, to be safe, and every time they come out to be just about right.4 squares shea butter soap
- Place the squares into a microwaveable glass measuring cup and microwave for 30 seconds.
- Use a rubber spatula and stir the soap well to help melt any thick chunks that are still in it and to scrape any off the sides, and then put back in the microwave for 20 more seconds.
- Measure out the almond oil and add to the soap, and then stir to blend well. Add in the essential oils one at a time. The cardamom is a thicker oil than the lime, but both can easily pour out faster than you may expect so be cautious. Stir the oils in thoroughly and then microwave for about 15 to 20 seconds. Get ready to pour into the molds.1.5 tbsp sweet almond oil, 12 drops cardamom essential oil, 8 drops lime essential oil, 8 drops coffee essential oil
- Check the soap for any lumpiness and scrape the sides and bottom of the bowl well, and if it needs to go in microwave one last time to be sure it is all melted, go ahead and do another 15 seconds. It is better to be sure it’s all melted than have lumps in it.
- Slowly pour into the molds, leaving a slight space at the top to add on the coffee grounds.
- Once you have it all poured, get a good pinch of coffee in your fingers, or use a small spoon and sprinkle it across the top of the soap bars until they are covered all the way across. Gently press the coffee down into the soap just enough to make the grounds stick, but not completely covering them.1 tbsp coffee grounds
- Let the soap sit out at room temperature for an hour and a half, if you are doing the large bars, or closer to an hour for the smaller ones. Then check to see if they are totally cooled.
- How long they will take depends on the thickness of the molds you used. Feel the bottom middle of the mold to check them. If it’s still warm in the middle, give them a bit longer.
- Once they are ready, carefully pop them out of the molds. They will come out easier than you may expect. Bend back one corner of the mold with one hand and press on the back center of the bar with the other and that should do it.