DIY Hand Painted Rocks for Halloween
Hand painted rocks are a fun project for the family to do together. Decorate stones for a Halloween treat.
The whole process of collecting the rocks, and then decorating them, is an excellent time to bond with loved ones.

Hand Painted Rocks Trend
I read a few articles about people leaving painted stones around their towns. It’s a way to spread happiness and promote random acts of kindness.
Anyone who finds the unique rock crafts has their day instantly brightened. Of course, only do this with adult supervision.
Here’s an easy project that takes just a few supplies and minimal skills. It’s perfect for novice crafters or those of us who feel like we might lack DIY genes altogether.
Below is how to a make a Frankenstein and pumpkin rock. Finding the perfect rocks to use can be an adventure in itself.
Take the whole family on a hike to wherever you think you can find flat, smooth stones.
Supplies Needed for Painting Rocks
Here’s what you need to create these Halloween rocks. There’s a printable How-To card below.
- Round, smooth rocks
- Orange, green, and black craft paint
- Assorted paint brushes
- Googly eyes
- Paper towels
- Craft Glue
How to paint Halloween Rocks
Clean the flat, smooth rocks that you find and allow them to dry.
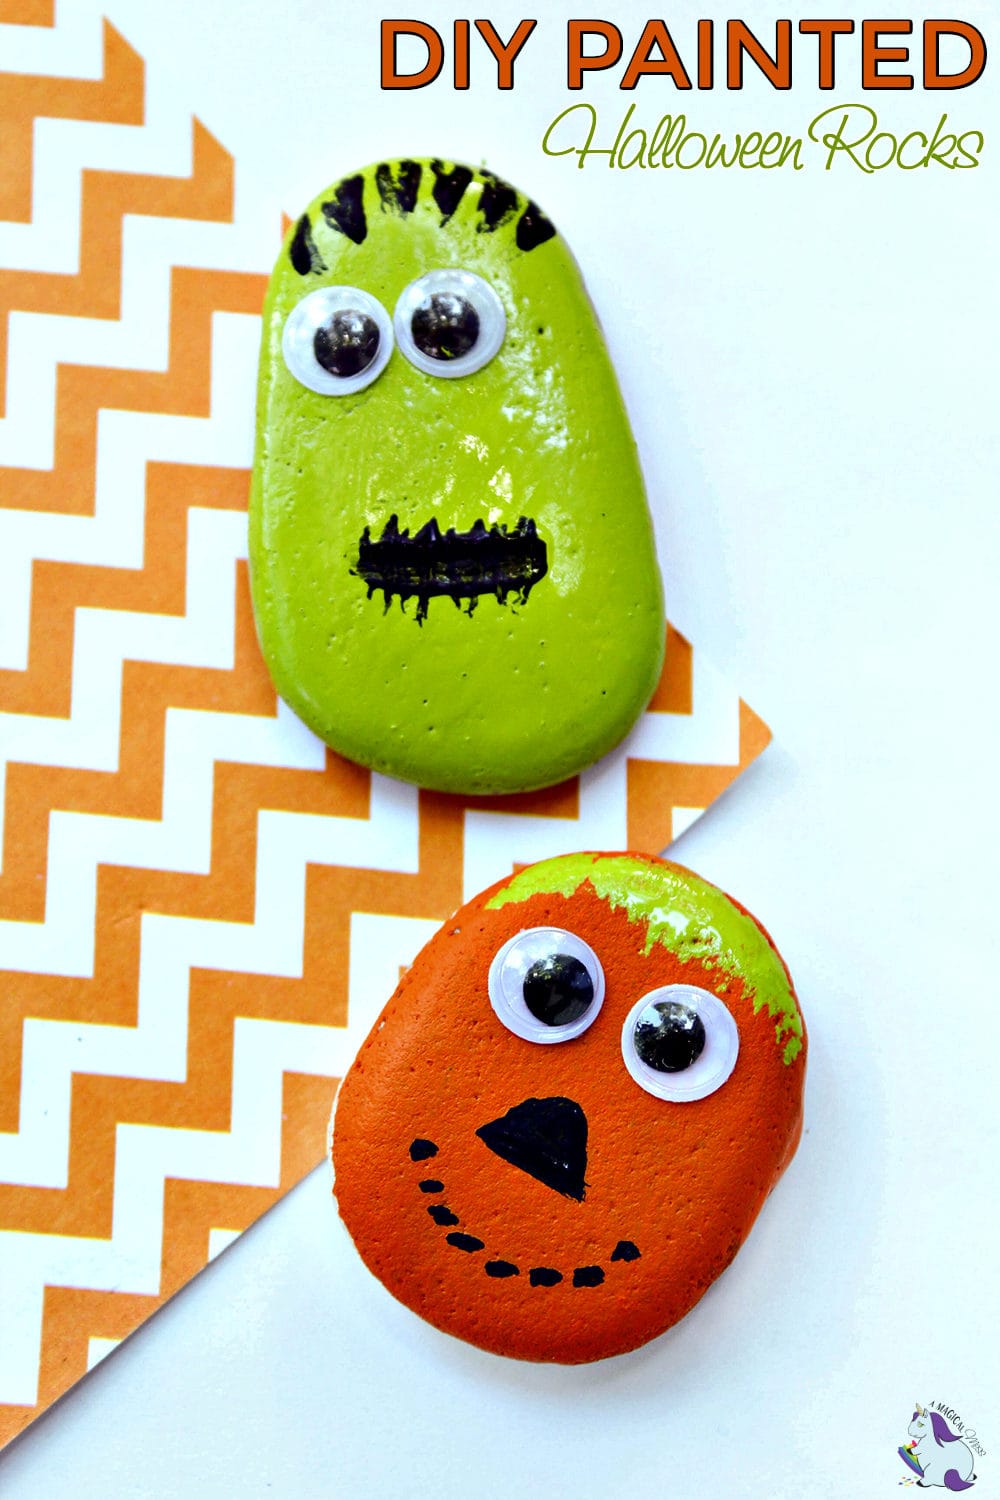
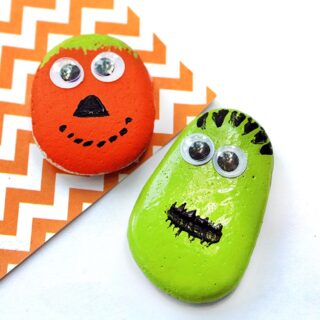
Apply two coats of paint to the rocks. For Frankenstein, apply two coats of green. For the pumpkin, apply two coats of orange. Allow the paint to dry thoroughly.
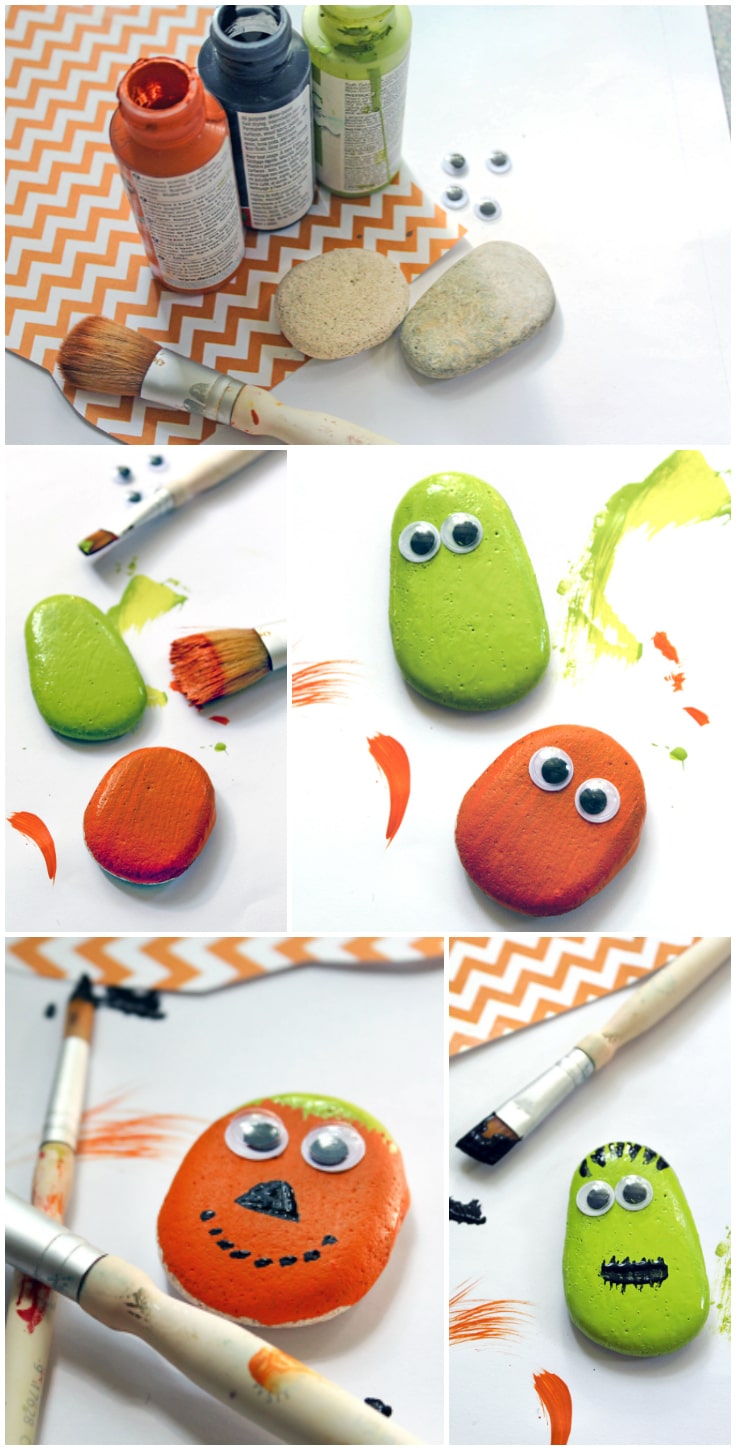
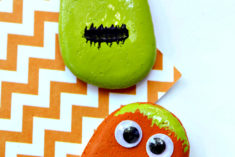
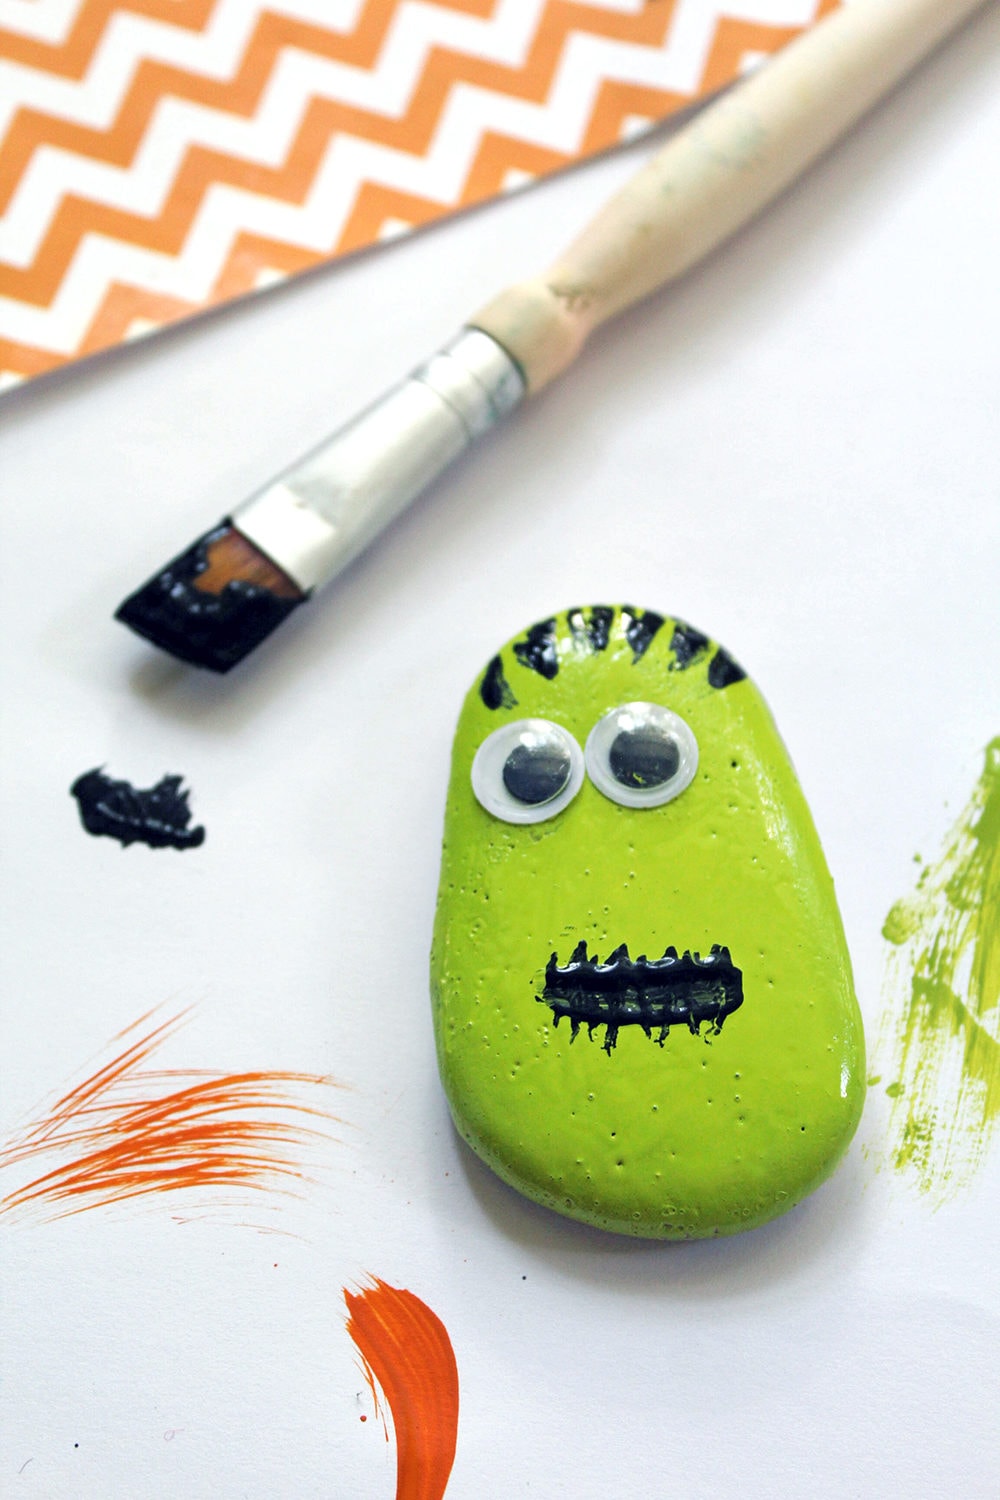
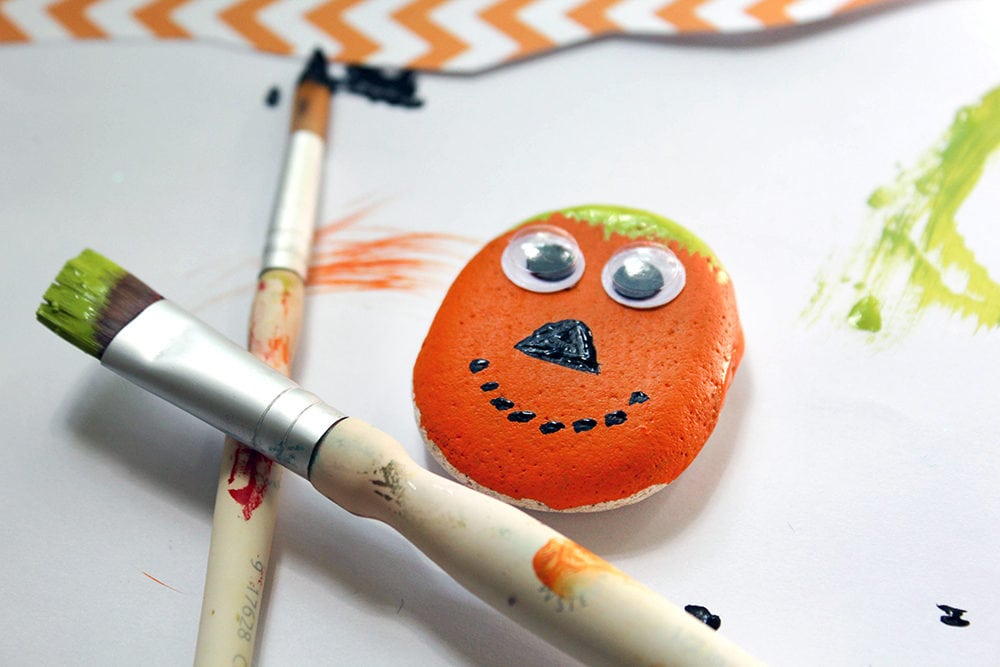
Once the paint is dry on the rocks, apply the eyes. Add a dot of glue to the back of the googly eyes and press them into place. Place the eyes towards the top of the stones, so you have room for the rest of the facial features.
Next, add the faces to the rocks. Decorate the pumpkin with a simple polka dot mouth and triangle nose. Add some green spiky hair at the top. For Frankenstein, draw a stitched mouth and spiky hair using black pain. Get creative!
Place the stones on a warm windowsill to allow them to dry.
Once the Halloween hand painted rocks are dry, enjoy them however you want. Use them as Halloween decorations, share with family and friends, surprise neighbors with your creations, or let the kids play with them.
Maybe start a kindness project in your own neighborhood. Check local Facebook groups to see if anyone is aware of the idea of leaving fun craft projects around for others to find.
Ideas like this tend to spread quickly. We can all use more happiness in our areas, so as long as it’s done safely and responsibly, it’s a good idea.
Hand Painted Halloween Rocks
Equipment
This post contains affiliate links. As an Amazon Associate, I earn from qualifying purchases at no extra cost to you.
Ingredients
- 2 rocks round, smooth
- orange craft paint
- green craft paint
- black craft paint
- Googly eyes
- Paper towels
- Craft glue
Instructions
- Apply two coats of paint to the rocks. For Frankenstein, apply two coats of green and for the pumpkin apply two coats of orange. Allow the paint to dry thoroughly.orange craft paint, green craft paint, black craft paint, Paper towels, 2 rocks
- Once the paint is dry, apply the eyes to the rocks. Add a dot of glue to the back of the googly eyes and press into place. Glue the eyes towards the top half of the stones, so you have room for the rest of the facial features.Googly eyes, Craft glue
- Next, add the embellishments to the rock faces. Decorate the pumpkin with a simple polka dot mouth and triangle nose. Give him some green hair towards the top. For Frankenstein, draw a stitched mouth and spiky hair with black paint. Feel free to get as creative as you wish while applying facial features.
- Allow all the craft paint to dry. A warm window sill is a perfect place to put them.
More Halloween Fun for Kids
- Green goblin goo punch
- Orange ghost punch
- Pumpkin surprise trick or treat game
- Monster crispy treats
What kinds of hand painted rocks would you like to create?


I love the idea of using these for random acts of kindness. So simple, yet so fun!
What a fun project to do with kids!
I like this idea. I have seen a few other hand painted rocks. This is a very creative idea.
I always loved pet rocks. These totally elevate that.