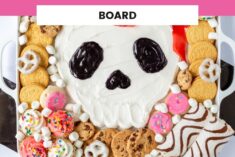
Spooky Halloween Skull Frosting Board Dessert
Ready to conjure up some good vibes at your next Halloween party? Get creative with this skull frosting board. This post contains affiliate links.
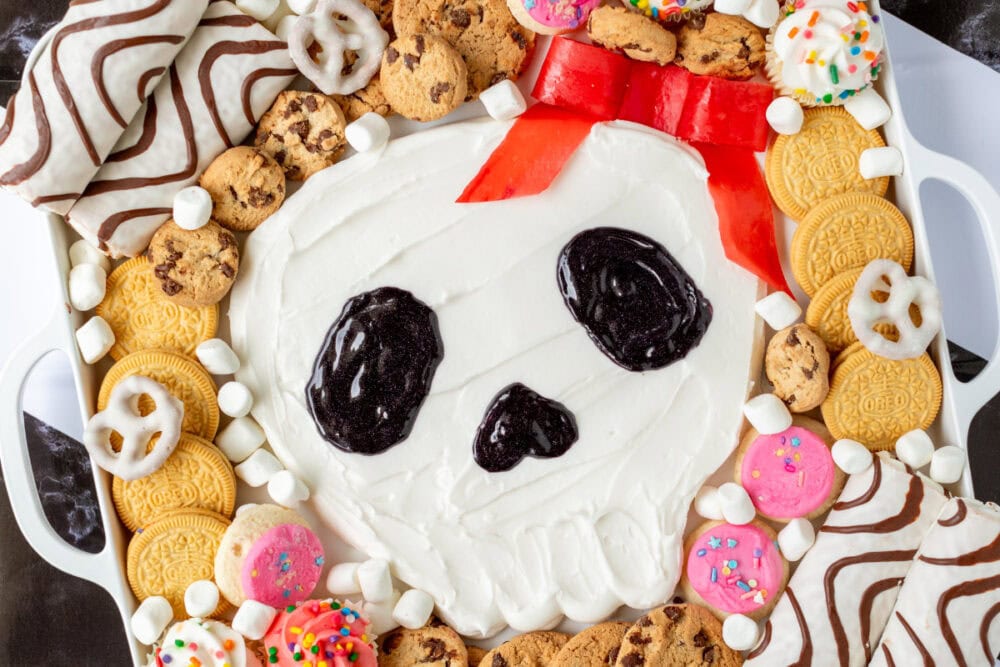
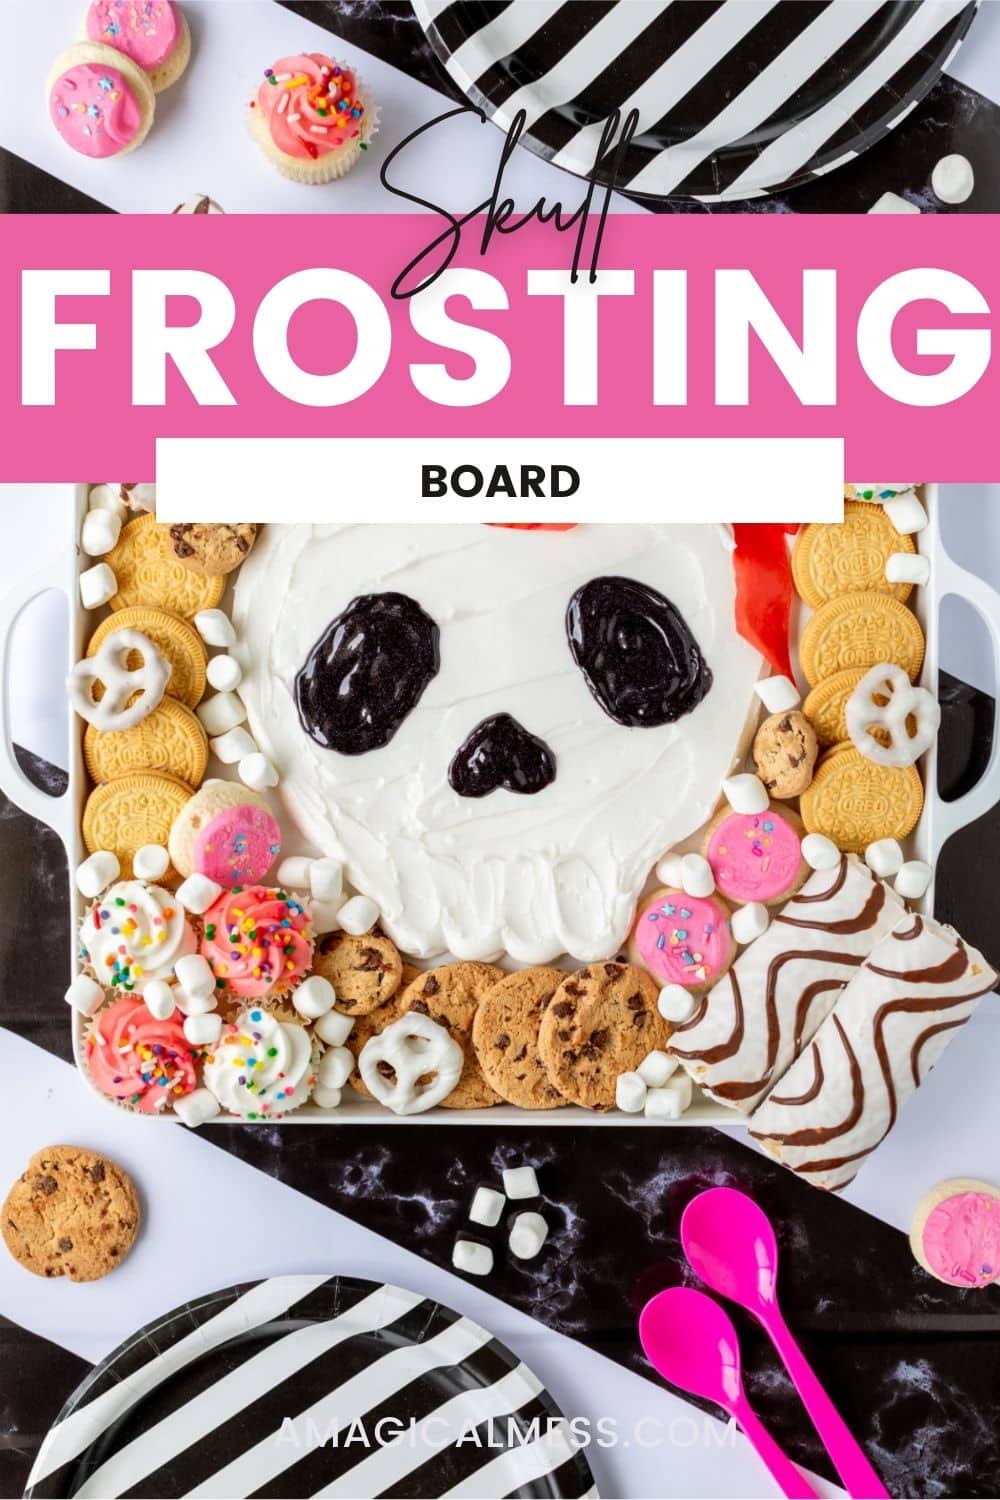
Forget the traditional charcuterie board; we’re dipping into the viral butter board trend with a sweet twist that’s perfect for the holiday season. A creamy and smooth buttercream skull surrounded by all your favorite sweet treats is sure to raise the best spirits for your party.
Easy Skull Frosting Board for Halloween
Adding to the little pumpkin buttercream board and the spooky bat icing board, here we have a skull for another Halloween option. Whether you are planning your own Halloween party or deciding what to bring as a guest, this no-bake and easy treat is sure to get everyone’s attention.
This recipe made me flashback to childhood, when my friends and I would gather around a different kind of board. We would try to summon spirits during recess at school. Seriously, who was supposed to be watching us?! LOL, gotta love the 80’s.
Today, I’d much rather gather around a dessert board like this, dipping sugary sweets into more sugar. I’d like to think we are still summoning the sweetest of spirits to join the party! Here’s a roundup of 14 spooky dessert recipes if you want more ideas.
Reasons to Love this Buttercream Frosting Board
- Total Crowd-Pleaser: With a variety of cookies and sweet treats, there’s something for everyone to munch on.
- Instagram-Worthy: The skull centerpiece made of American buttercream frosting is a showstopper that’ll have everyone tagging you on IG.
- Easy to Customize: You can easily swap in your favorite treats or seasonal goodies to make it your own.
- No Baking Required: Using store-bought treats means less time in the kitchen and more time enjoying the party.
- Conversation Starter: The unique design and fun elements make it a great way to get people talking.
- Versatile: Perfect for Halloween but easily adaptable for other holiday parties or events.
- Fun to Make: Piping the buttercream skull and arranging the treats is a creative and enjoyable process.
- Deliciously Different: It’s a sweet twist on the popular butter board trend, offering a dessert charcuterie experience.
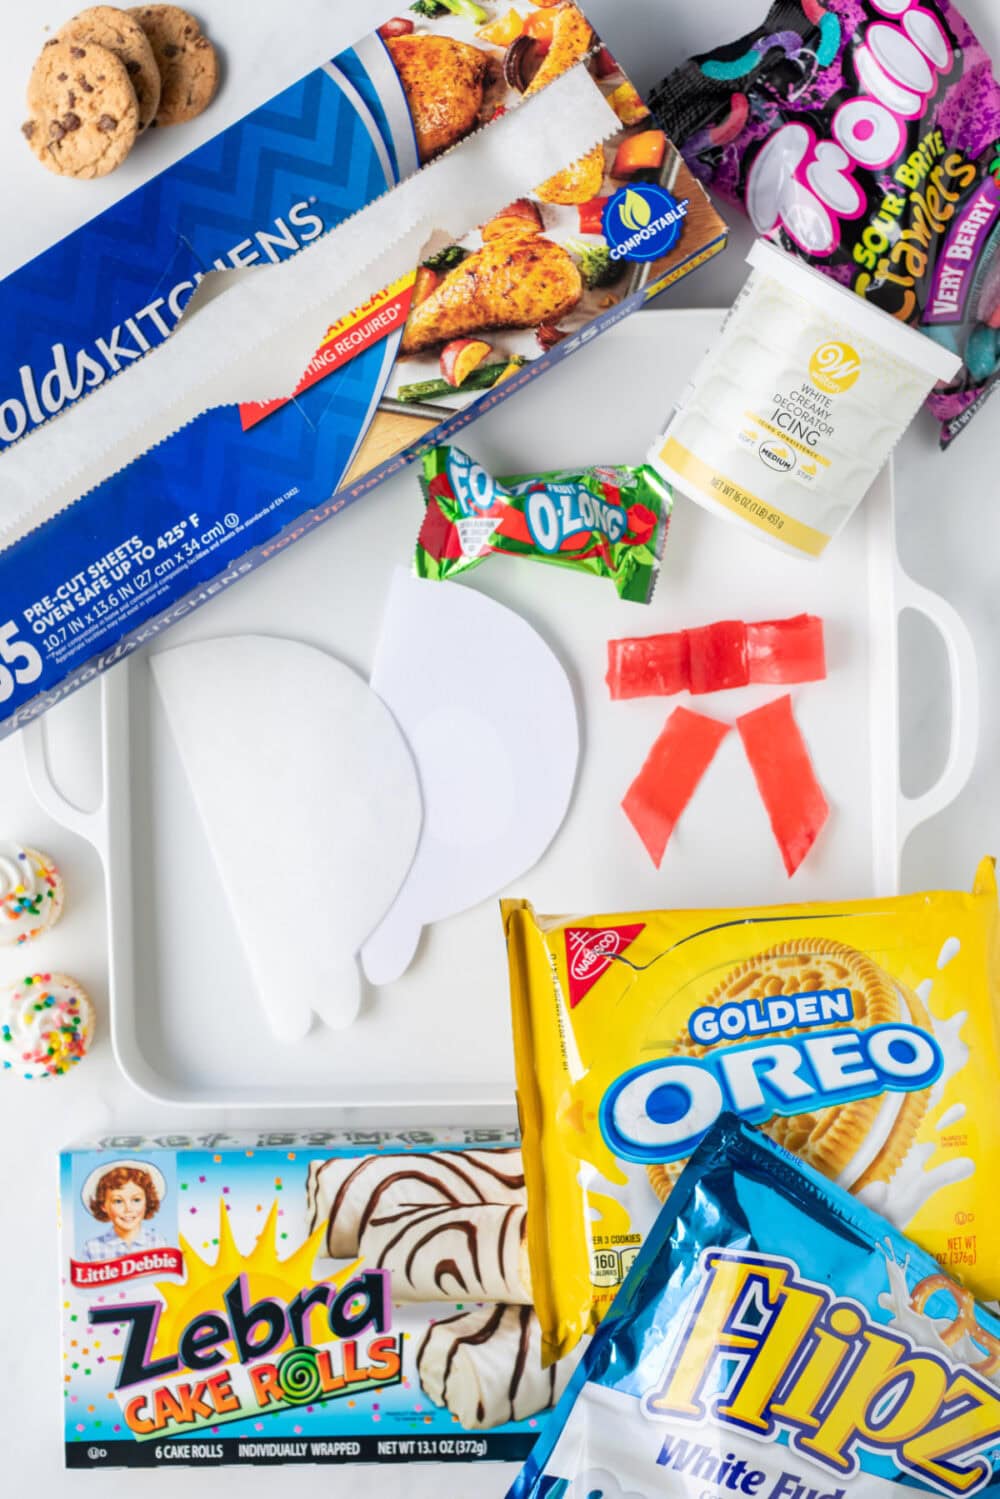
Sugary Skull Frosting Board Ingredients
Here’s what you need to make this dessert board recipe. The measurements are in the recipe card below.
- Fruit by The Foot
- Wilton Creamy Decorator Icing, Medium
- Black Wilton Sparkle Gel
- Little Debbie Zebra Cake Rolls
- Mini Cupcakes
- Golden OREO Cookies
- Chips Ahoy! Cookies
- Mini Frosted Sugar Cookies
- Mini Chocolate Chip Cookies
- White Chocolate Pretzels
- Mini Marshmallows
Supplies Needed
- Square Serving Tray (amazon) or your choice of Pretty Serving Tray
- Round Piping Tip
- Disposable Decorating Pastry Bag
- Parchment Paper Sheet
- Offset Spatula
- Kitchen Shears
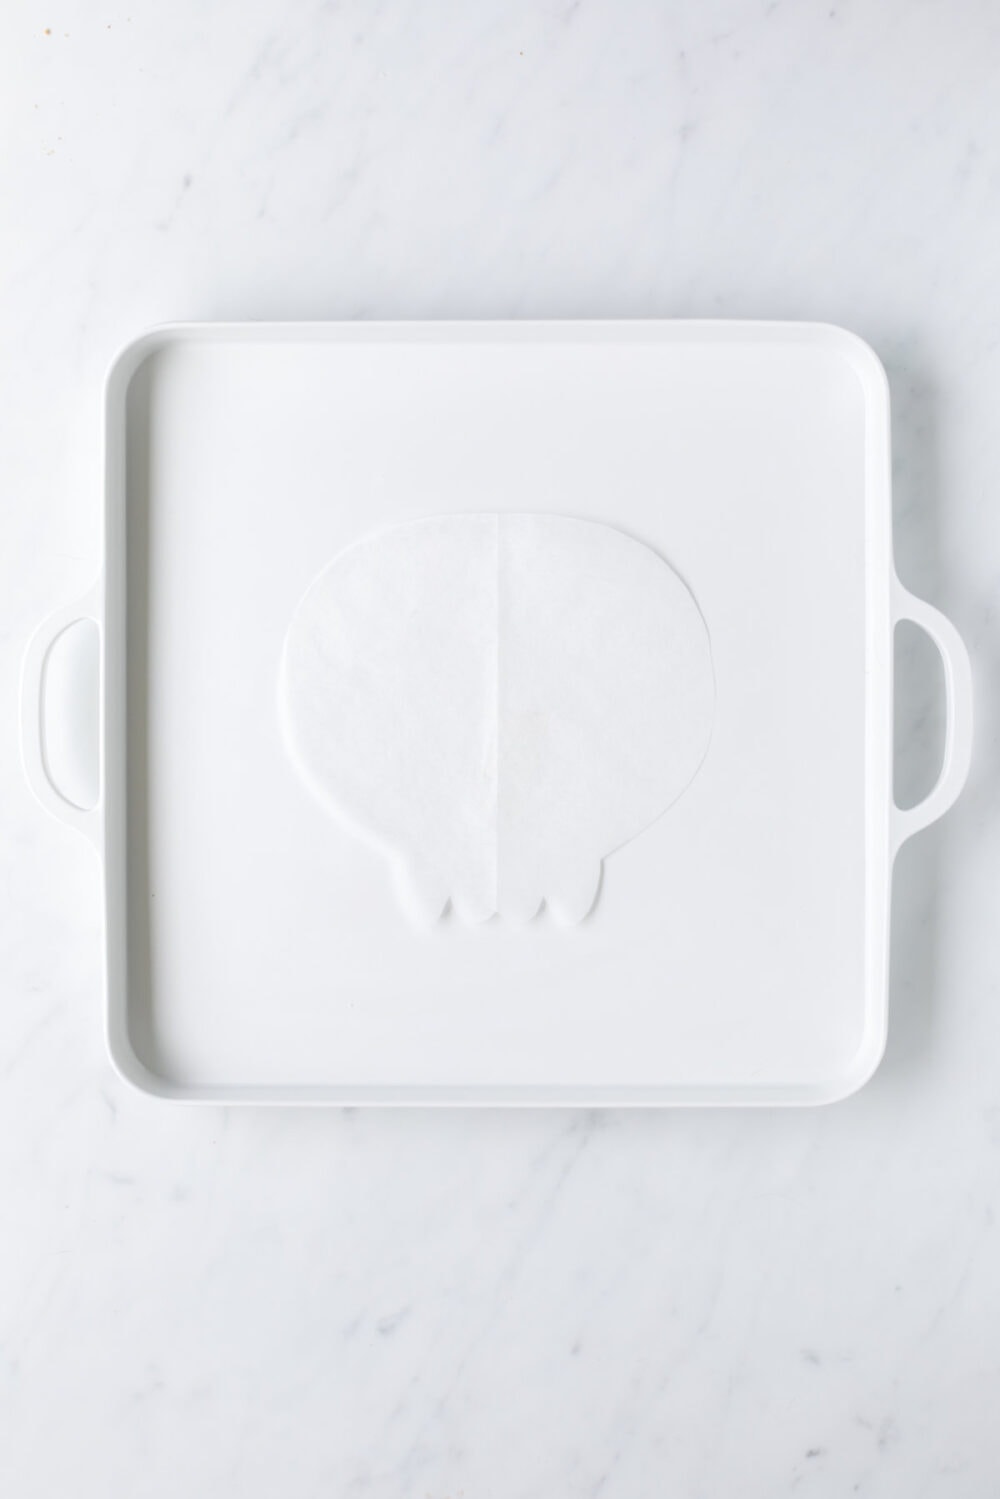
- Skull Template
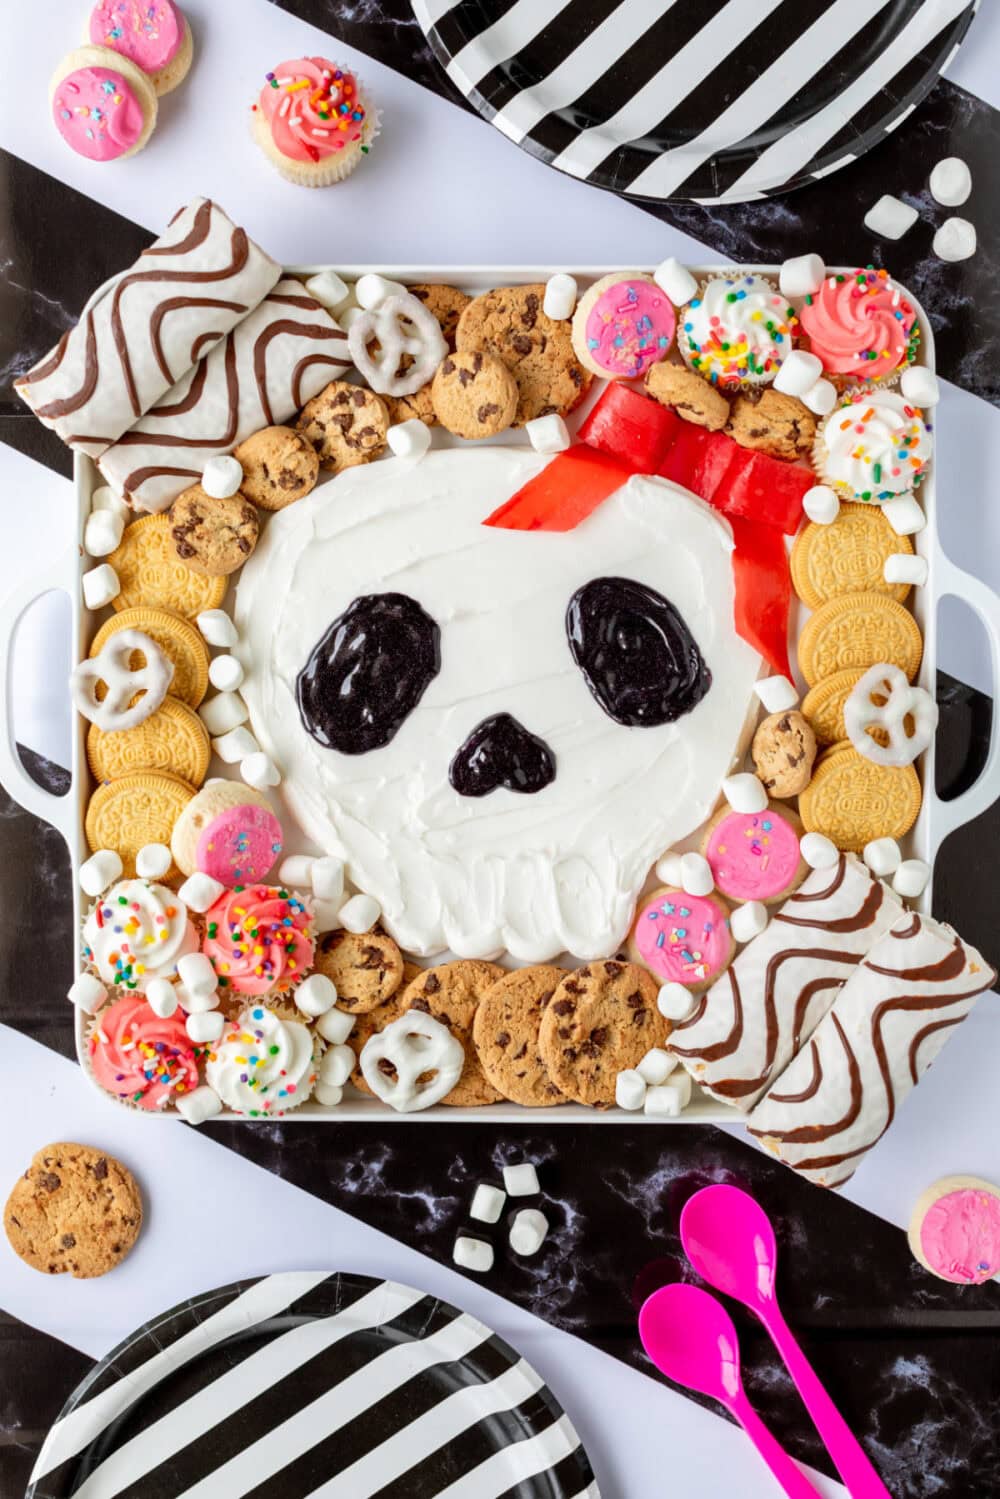
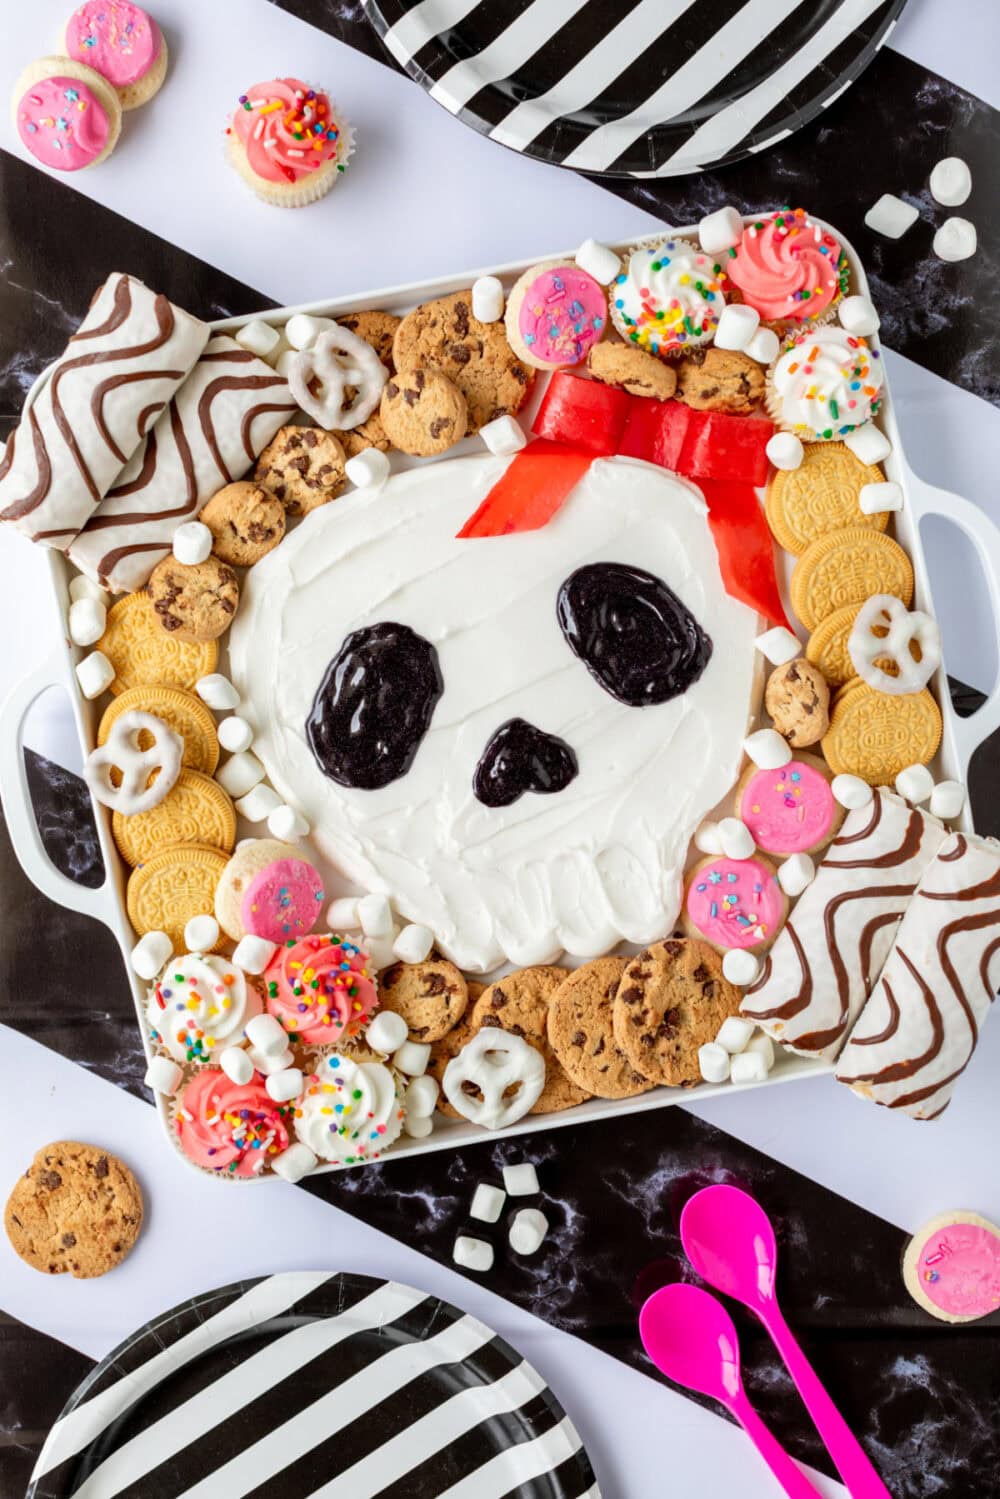
How to Make the Skull Frosting Board
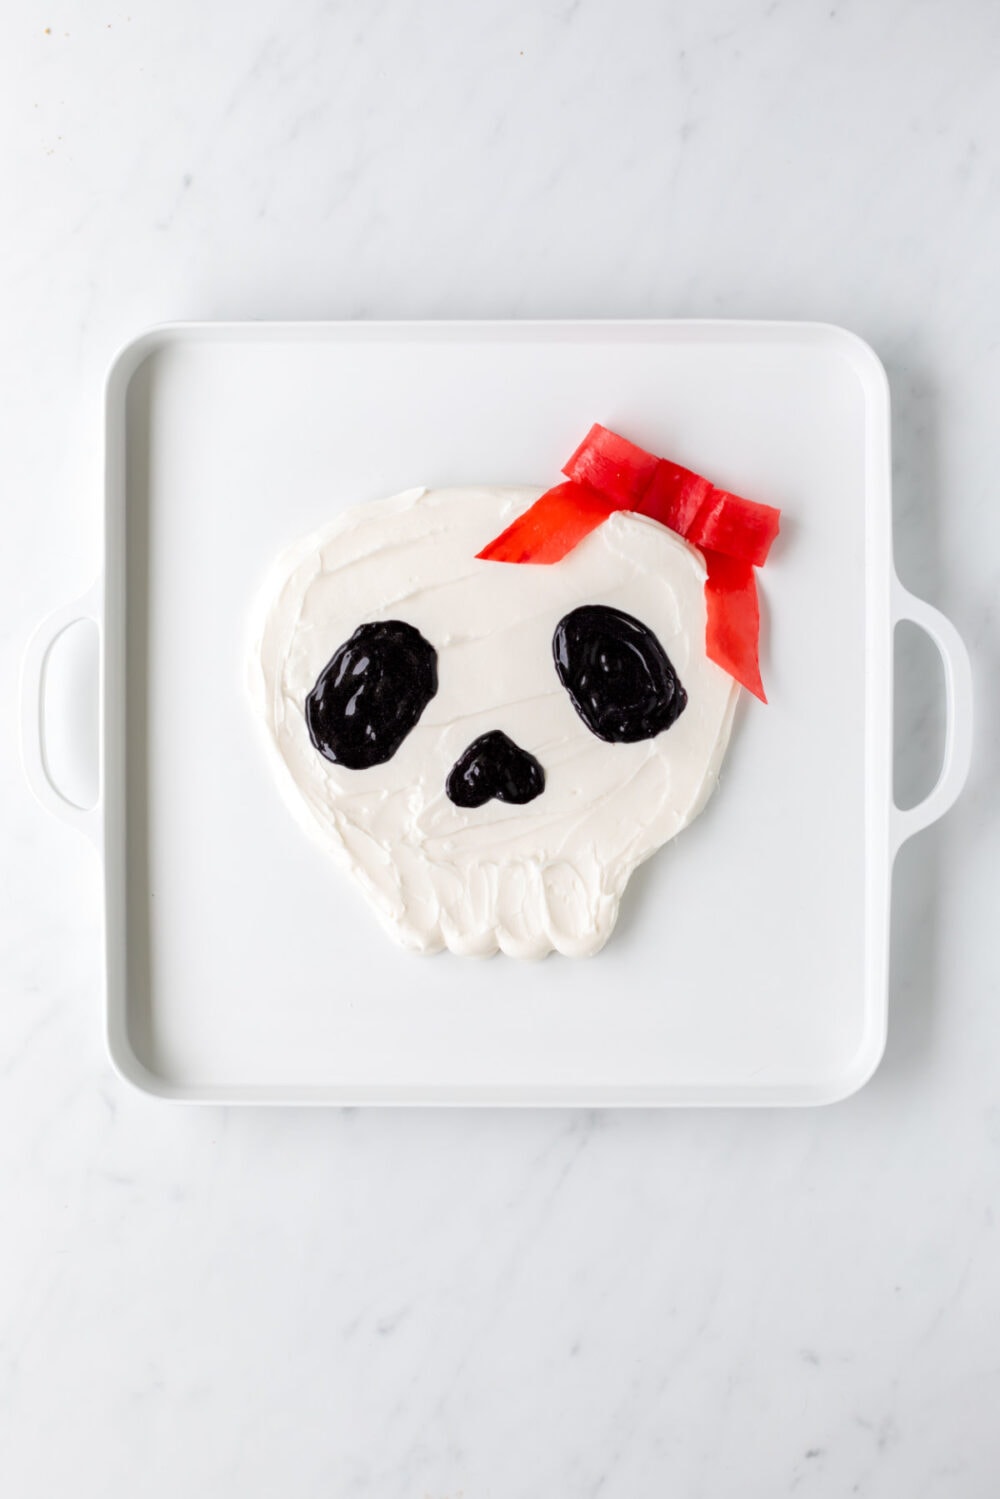
Craft a Fruit by The Foot Bow: Snip a strip of Fruit by The Foot to create the loop base for your bow. Use a smidgen of frosting as your “magic adhesive” to hold it together. Wrap a small rectangle piece around the loop and secure with more frosting. Cut two more strips and attach them to the bow’s base, trimming the ends at an angle for that perfect bow look. For the finishing touch, roll two small pieces and tuck them under the bow loops to give them some lift.
Prep Your Pastry Bag: Fit your pastry bag with a Round Pastry Tip and fill it up with all that luscious icing.
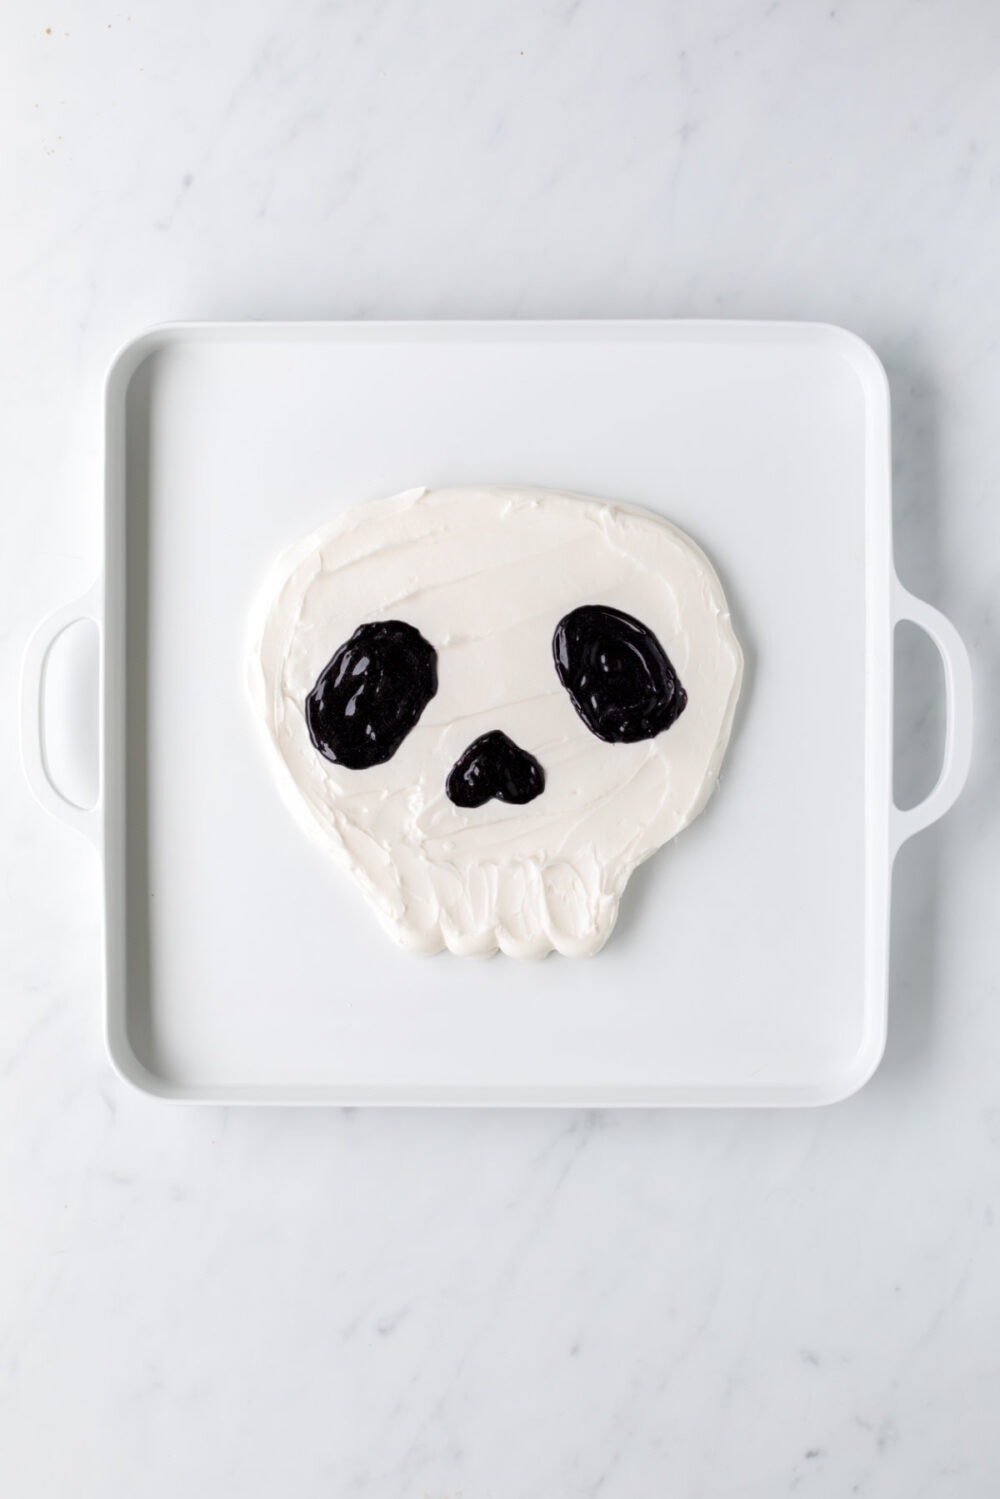
Skull Template Setup: If you’re using a skull template, click here and print it out, cut it out and trace it onto parchment paper. Secure this guide to the center of your serving board.
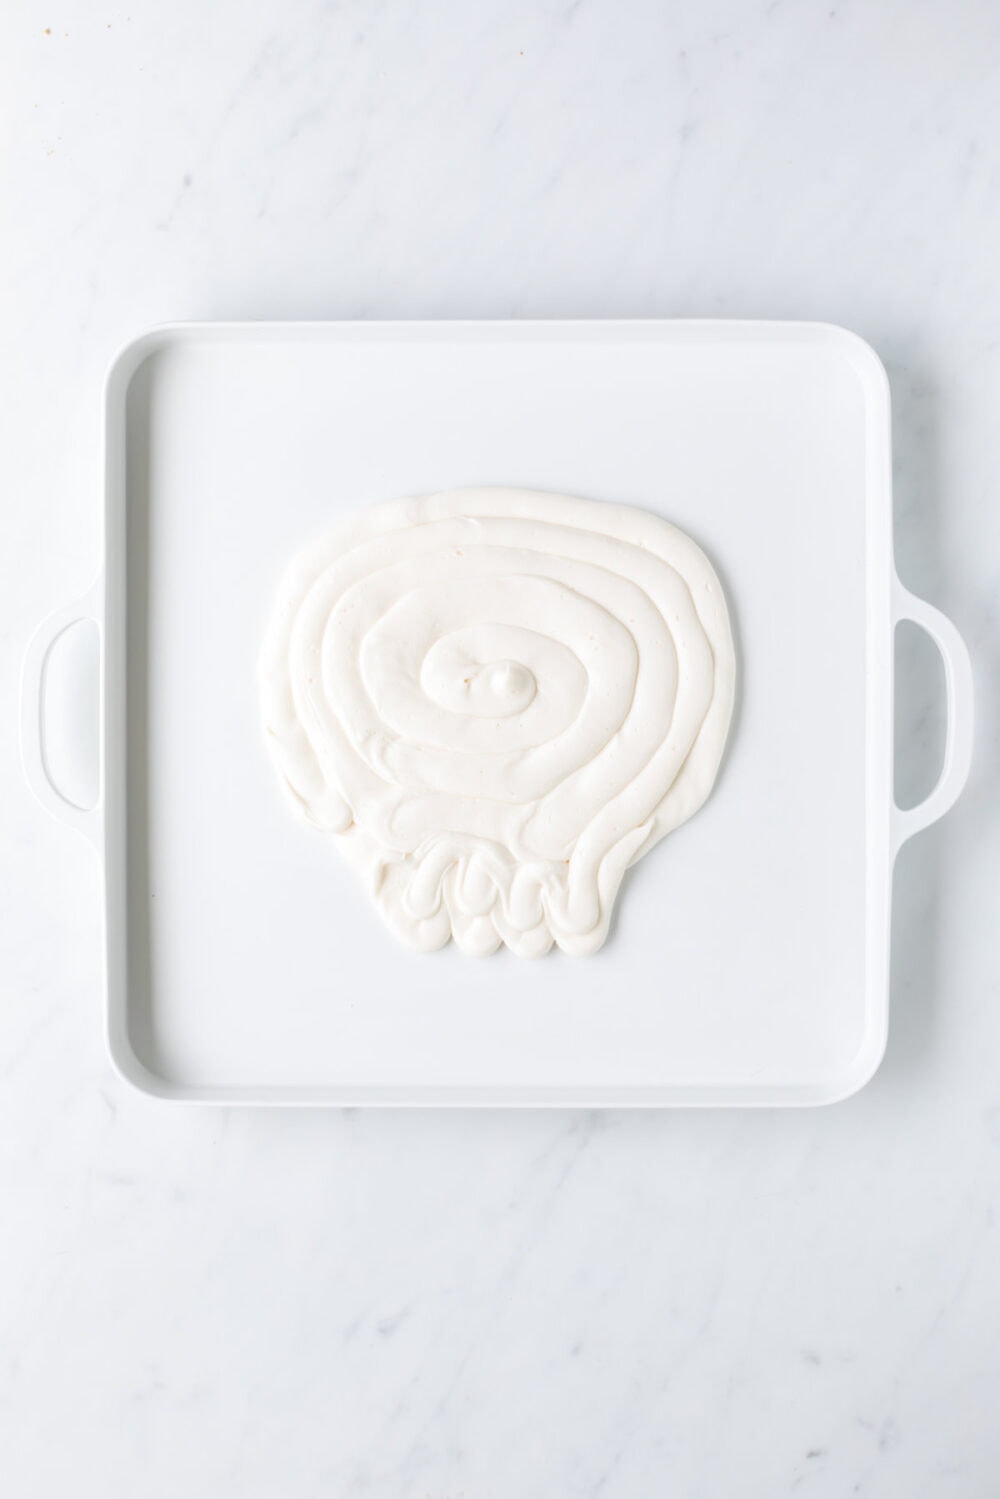
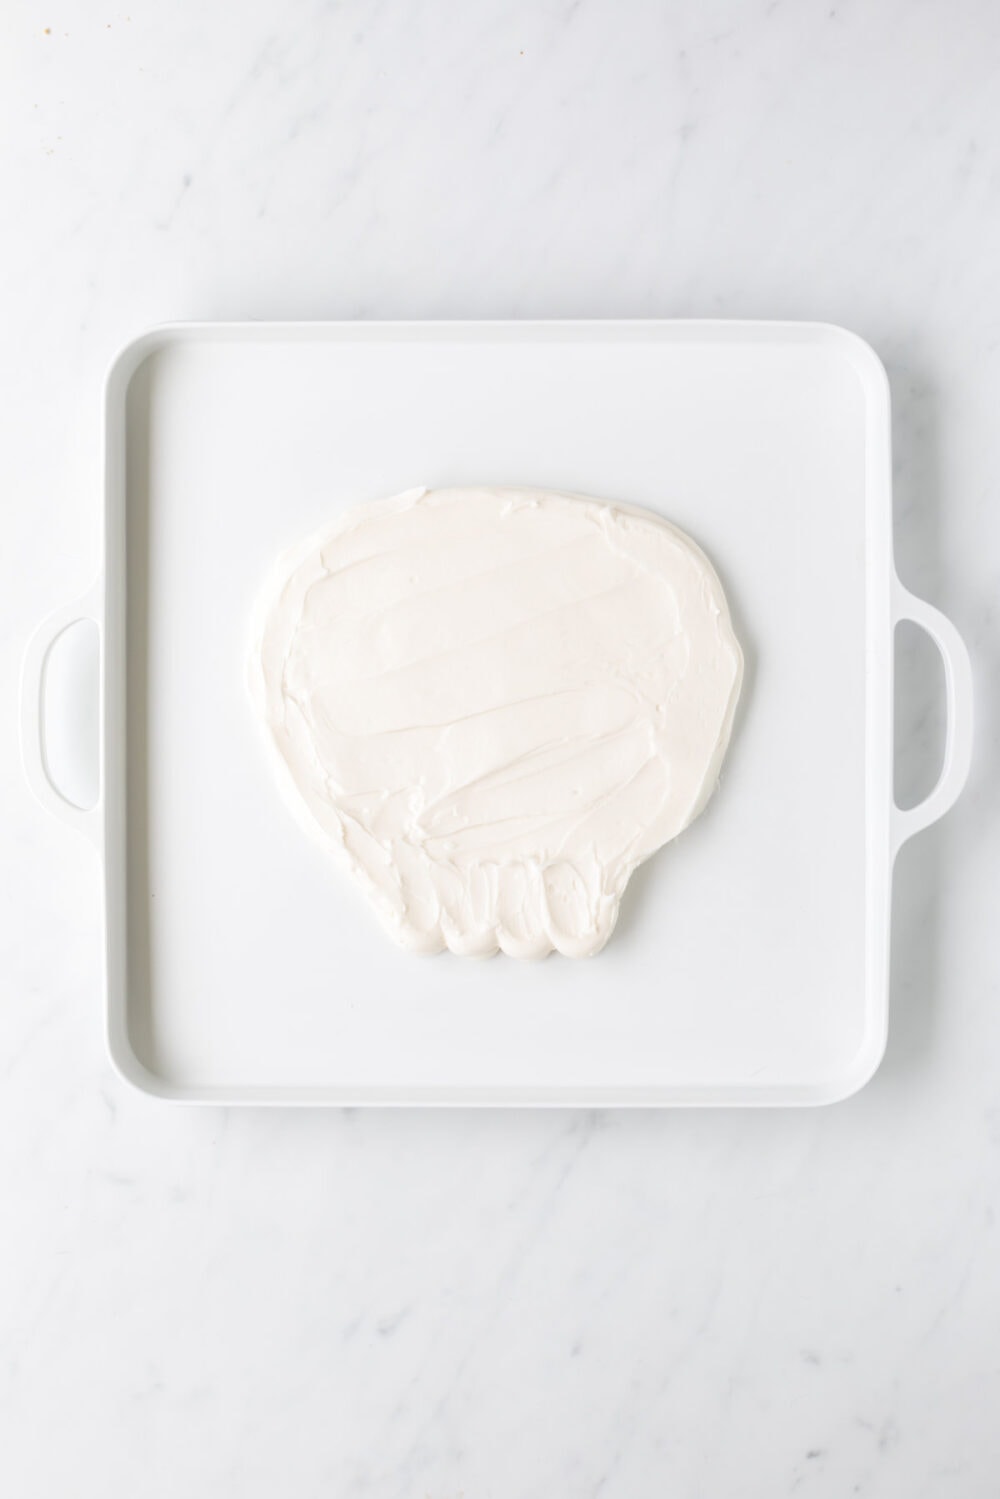
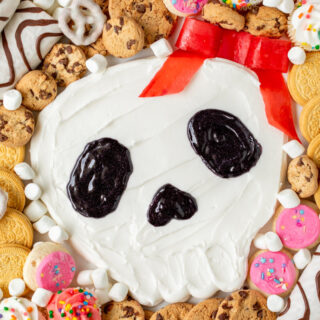
Frost Away: Whether you’re tracing or going freehand, outline your skull shape first. Then, channel your inner artist and fill in the skull as if you’re coloring it in.

Smooth and Define: Use an offset spatula to smooth out the frosting surface. Add some defining lines at the skull’s base to give it that extra oomph.
Bow Placement: Draw on the eyes and nose using the Black Glitter Gel. Position your Fruit by The Foot bow on the top right corner of your frosting skull.
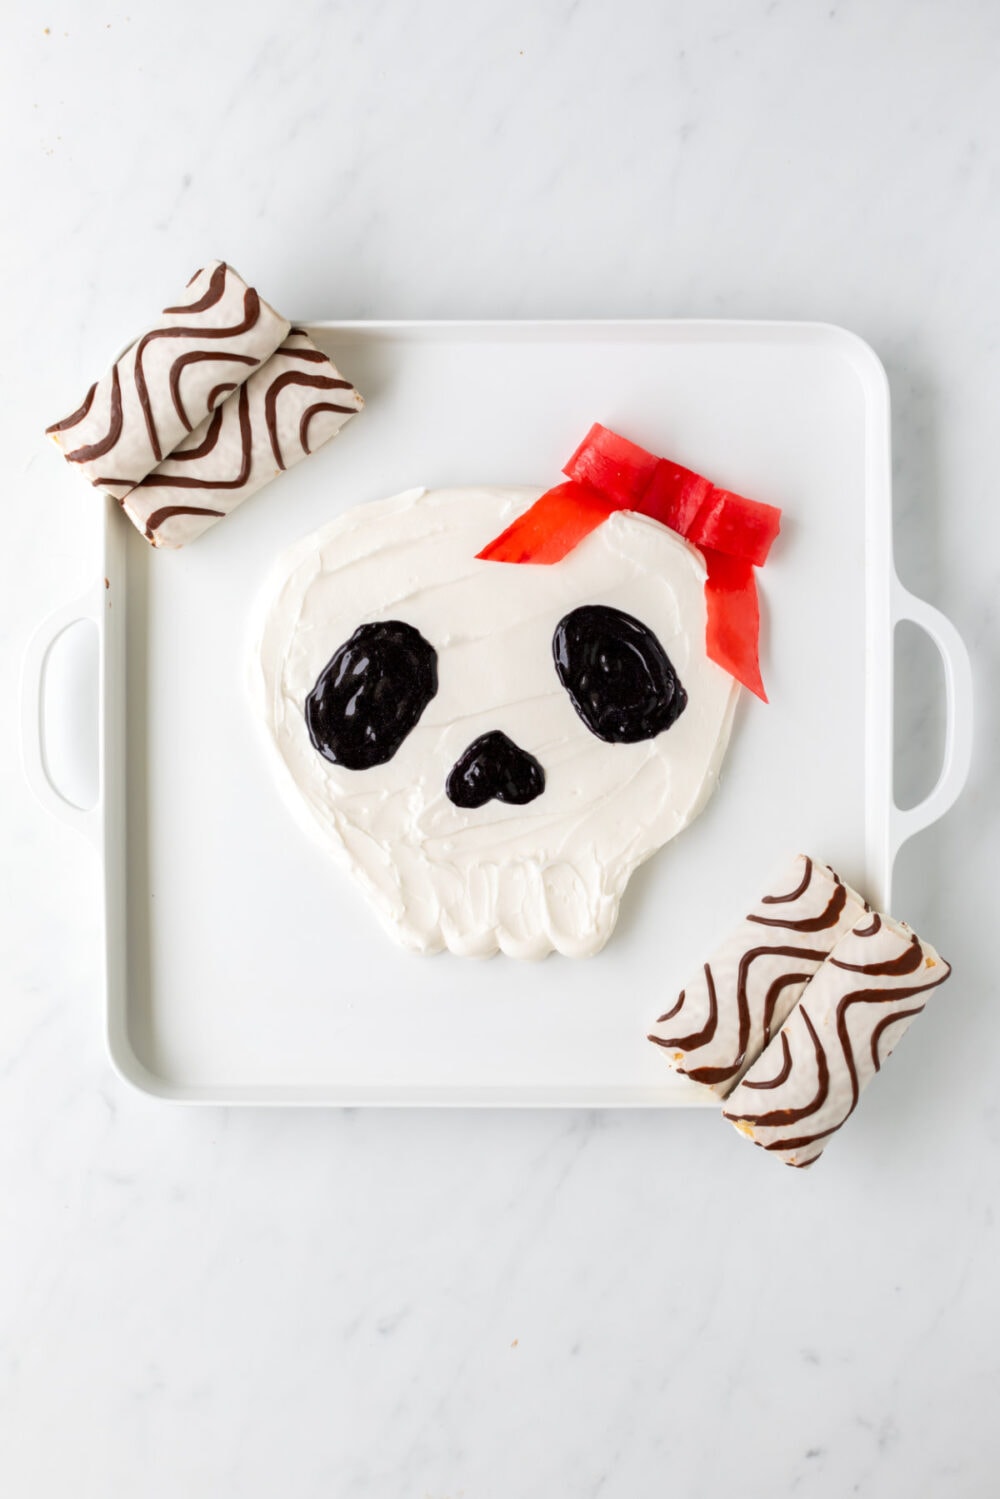
Zebra Cake Corners: Place Zebra cakes on the top left and bottom right corners of your board.
Cupcake Corners: Add mini cupcakes to the top right and bottom left corners.
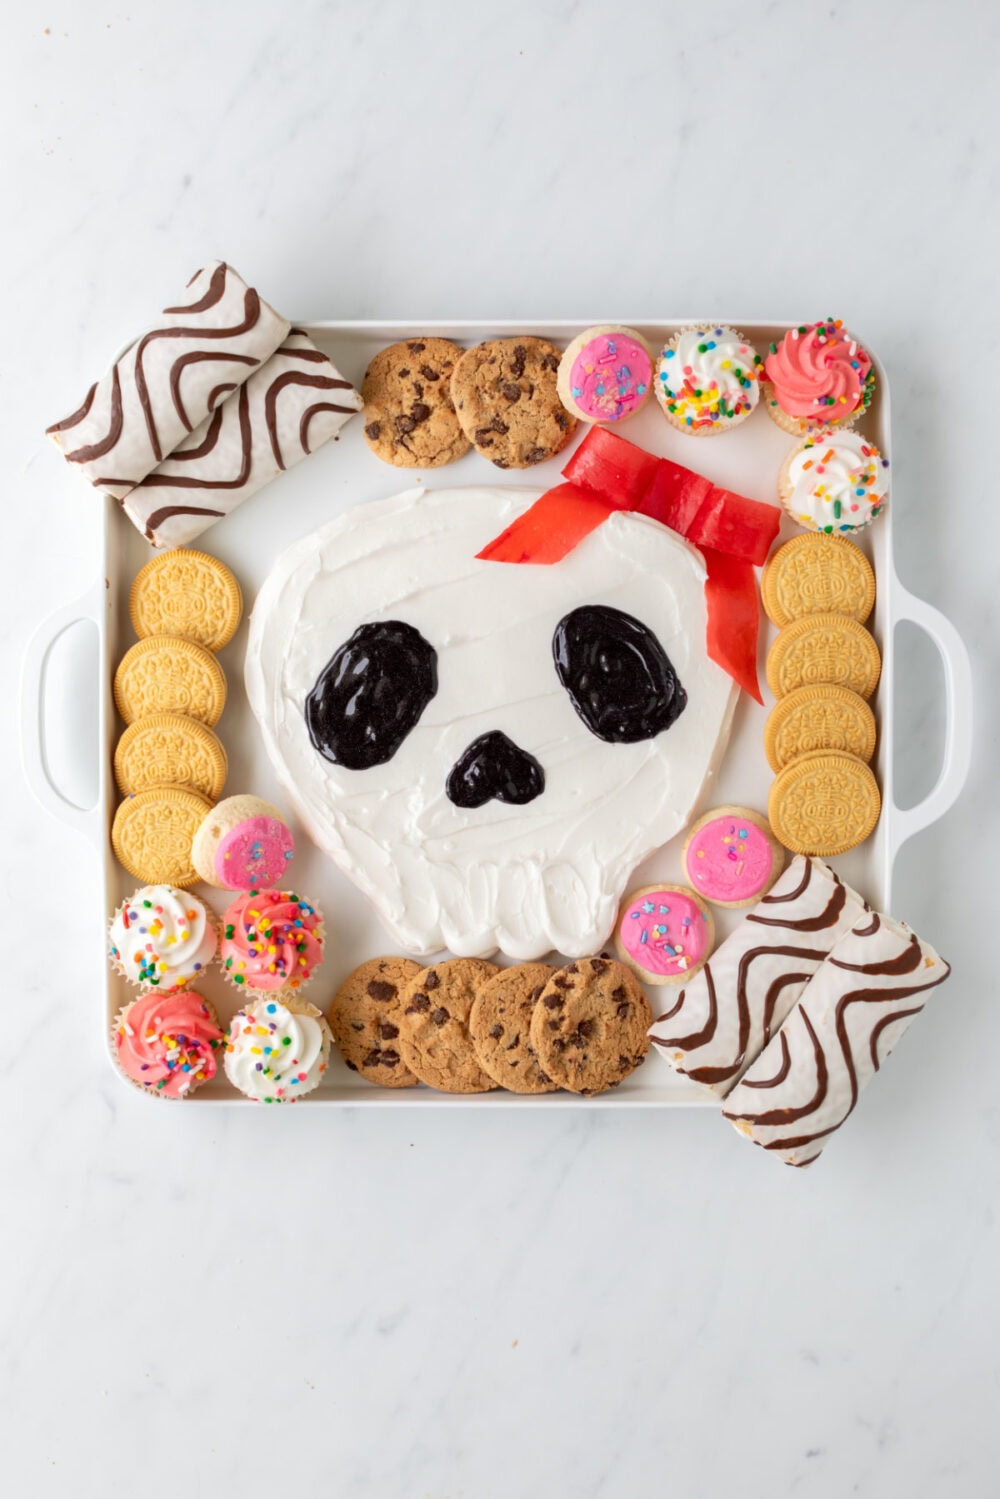
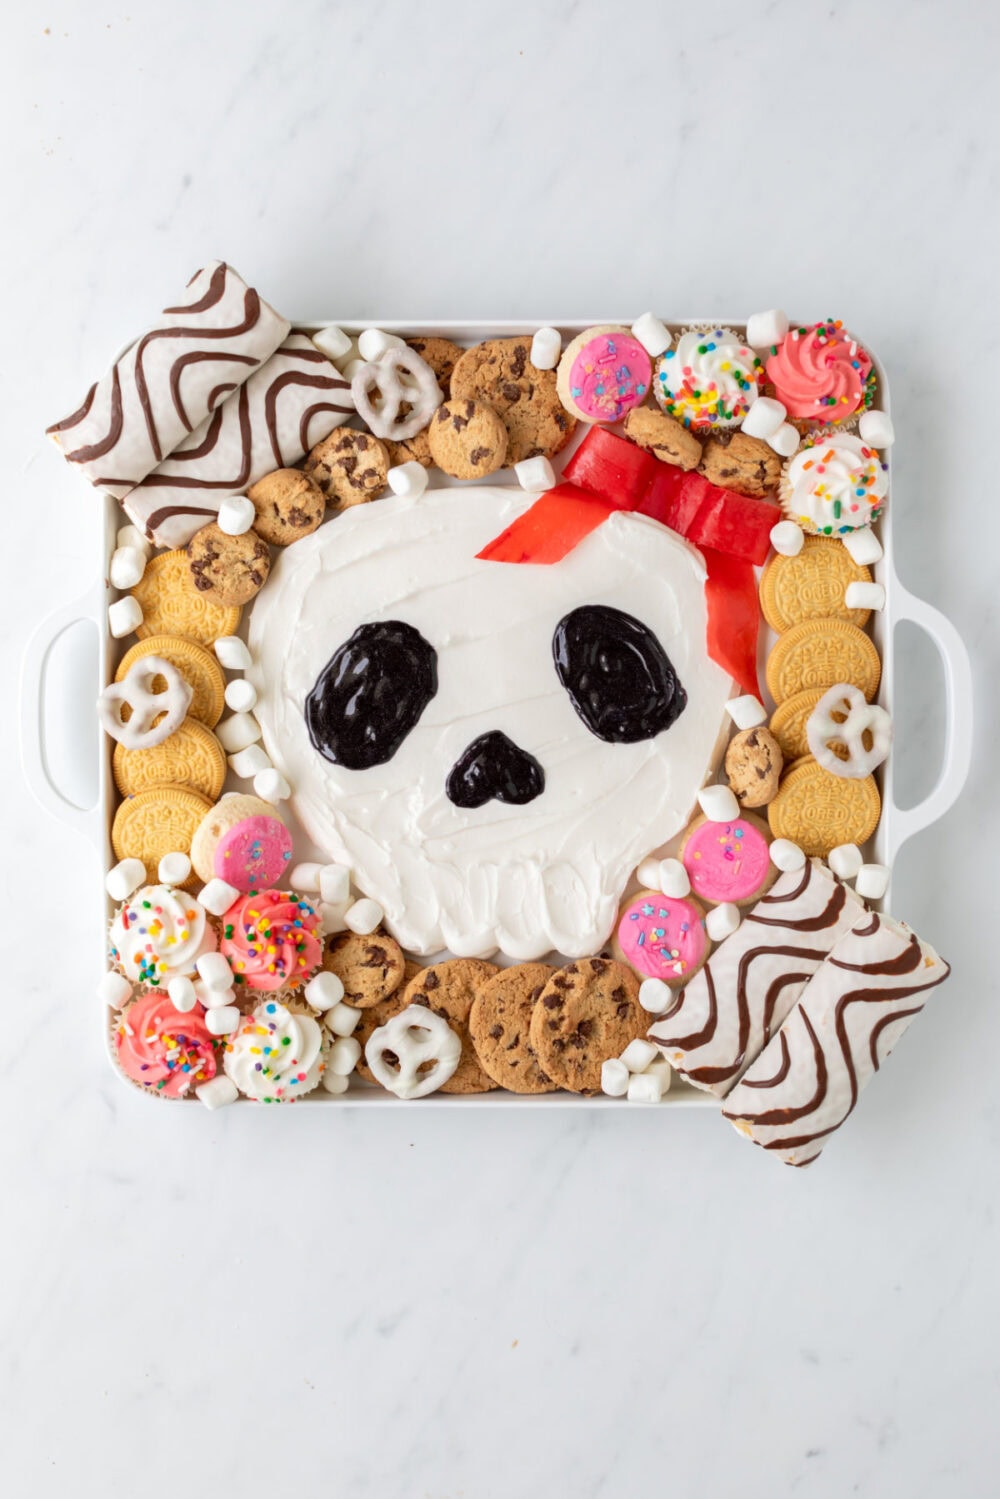
Golden OREO Sides: Line the left and right sides of your platter with Golden OREO cookies.
Chips Ahoy! Top and Bottom: Place Chips Ahoy! cookies at the top and bottom of your platter.
Fill in the Gaps: Use mini frosted cookies, mini chocolate chip cookies, and pretzels to fill in any open white spaces.

Marshmallow Magic: Fill in all remaining nooks and crannies with
Serving Time: Present your masterpiece with spoons and plates, and get to dipping!
What Else to Serve
If you’re looking for more spooktactular treats to add to your Halloween dessert table, here are some suggestions:
Halloween Punch: Either this easy recipe for orange ghost punch or this green goblin goo for a creepy beverage choice.
Side Dishes: If you are also offering dinner, butternut squash bat soup and Halloween pasta salad are both absolute hits!
Other Munchies: Monster rice crispies and Moldy Halloween Muffins are other fun treats.
Recipes Substitutions and Variations
- Swap the Fruit by The Foot: Use licorice strings or gummy worms for a different chewy element.
- Alternate Icing: If you’re not a fan of store-bought decorator icing, homemade buttercream or cream cheese frosting works just as well.
- Cake Roll Options: Instead of Zebra Cake Rolls, try Swiss Rolls or even Ho Hos for a chocolatey twist.
- Cookie Choices: Feel free to use your favorite cookies like, chocolate OREOs, Nutter Butters, or even Girl Scout cookies like Thin Mints or Samoas.
- Pretzel Variations: If white chocolate isn’t your jam, opt for dark chocolate or yogurt-covered pretzels.
- Marshmallow Madness: Use flavored marshmallows like strawberry or coconut for an extra pop of taste.
- Gluten-Free Goodness: Use gluten-free cookies and treats to make the board accessible to more people. (I’m currently obsessed with Partake GF cookies — so good!)
- Spooky Additions: Add some candy eyeballs or gummy spiders for extra Halloween flair.
- Mini Muffins: If cupcakes aren’t your thing, mini muffins can offer a less sugary option.
- Additional Fillers: You can also use chocolate chips, nuts, cake pieces, chunks of pound cake, brownie bites, sprinkles, or other broken up snacks of your choice to fill in the spaces of your board.
How to Store Leftovers
If you find yourself with leftovers, simply store the remaining treats in an airtight container to keep them fresh. For the buttercream skull, scoop it into a separate airtight container and refrigerate. It will stay fresh for up to a week.
Recipe Notes and FAQ
Notes:
- Feel free to get creative with the layout of your board. There’s no right or wrong way to arrange your treats!
- If you’re using homemade buttercream, make sure it’s at room temperature for easier piping.
FAQ:
Q: Can I make the buttercream skull in advance?
A: Absolutely! Just store carefully covered in the fridge. Add all the dippers the day you plan to serve.
Q: What if I don’t have a piping bag?
A: A zip-top bag with a corner snipped off can work in a pinch.
Q: Can this board be made vegan or gluten-free?
A: Yes, just swap out the treats and frosting for vegan or gluten-free options.
Q: How long will the board stay fresh?
A: The treats will stay fresh for a couple of days if stored properly, and the buttercream can last up to a week in the fridge.
Q: Can I use different types of frosting?
A: Of course! Feel free to experiment with different flavors of frosting to suit your taste buds.
Q: Is this recipe kid-friendly?
A: This recipe is a hit with kids, but adult supervision is recommended for the assembly, especially if you’re using sharp utensils.
Halloween Skull Frosting Board
Equipment
- Parchment Paper
This post contains affiliate links. As an Amazon Associate, I earn from qualifying purchases at no extra cost to you.
Ingredients
- 1 Fruit by The Foot Strawberry Tie Die
- 16 oz Decorators Icing
- black sparkle gel
- 4 Little Debbie Zebra Cake Rolls
- 6 Mini Cupcakes
- 8 Golden OREO Cookies
- 8 Chips Ahoy! Cookies
- 6 Mini Frosted Cookies Pink
- 12 Mini Chocolate Chip Cookies
- 12 White Chocolate Pretzels
- ½ cup Mini Marshmallows
Instructions
- Fashion a bow from a Fruit by The Foot strip, using small dabs of frosting as adhesive. Secure a loop for the bow's base, wrap a tiny rectangle around it, and add two angled strips at the base. Insert rolled pieces under the loops for volume.1 Fruit by The Foot
- Equip a pastry bag with a Round Pastry Tip and fill it to the brim with icing.16 oz Decorators Icing
- If using a skull template, print, cut, and trace it onto parchment paper. Anchor it to the middle of your serving board.
- Sketch the outline of the skull with your icing, then proceed to fill it in as if you're coloring.
- Employ an offset spatula to level the frosting and etch lines at the base of the skull for definition.
- Place your crafted Fruit by The Foot bow on the upper right corner of your frosting skull. Create eyes and a nose using the sparkle gel.black sparkle gel
- Arrange Zebra cakes at the upper left and lower right corners of your board.4 Little Debbie Zebra Cake Rolls
- Position mini cupcakes at the upper right and lower left corners.6 Mini Cupcakes
- Line Golden OREO cookies along both the left and right sides of your platter.8 Golden OREO Cookies
- Add Chips Ahoy! cookies to the top and bottom edges of your board.8 Chips Ahoy! Cookies
- Fill any remaining white space with mini frosted cookies, mini chocolate chip cookies, and pretzels.12 Mini Chocolate Chip Cookies, 12 White Chocolate Pretzels, 6 Mini Frosted Cookies
- Pack any leftover gaps with mini marshmallows.½ cup Mini Marshmallows
- Serve your Skull Frosting Board with spoons and plates, and let the feasting begin!
Pin this image to your Halloween dessert board to save and share!
Love a sugary spread like this?
Please share with your ghouls and gals, too! Drop a comment below if you try this Halloween icing board at your next party.