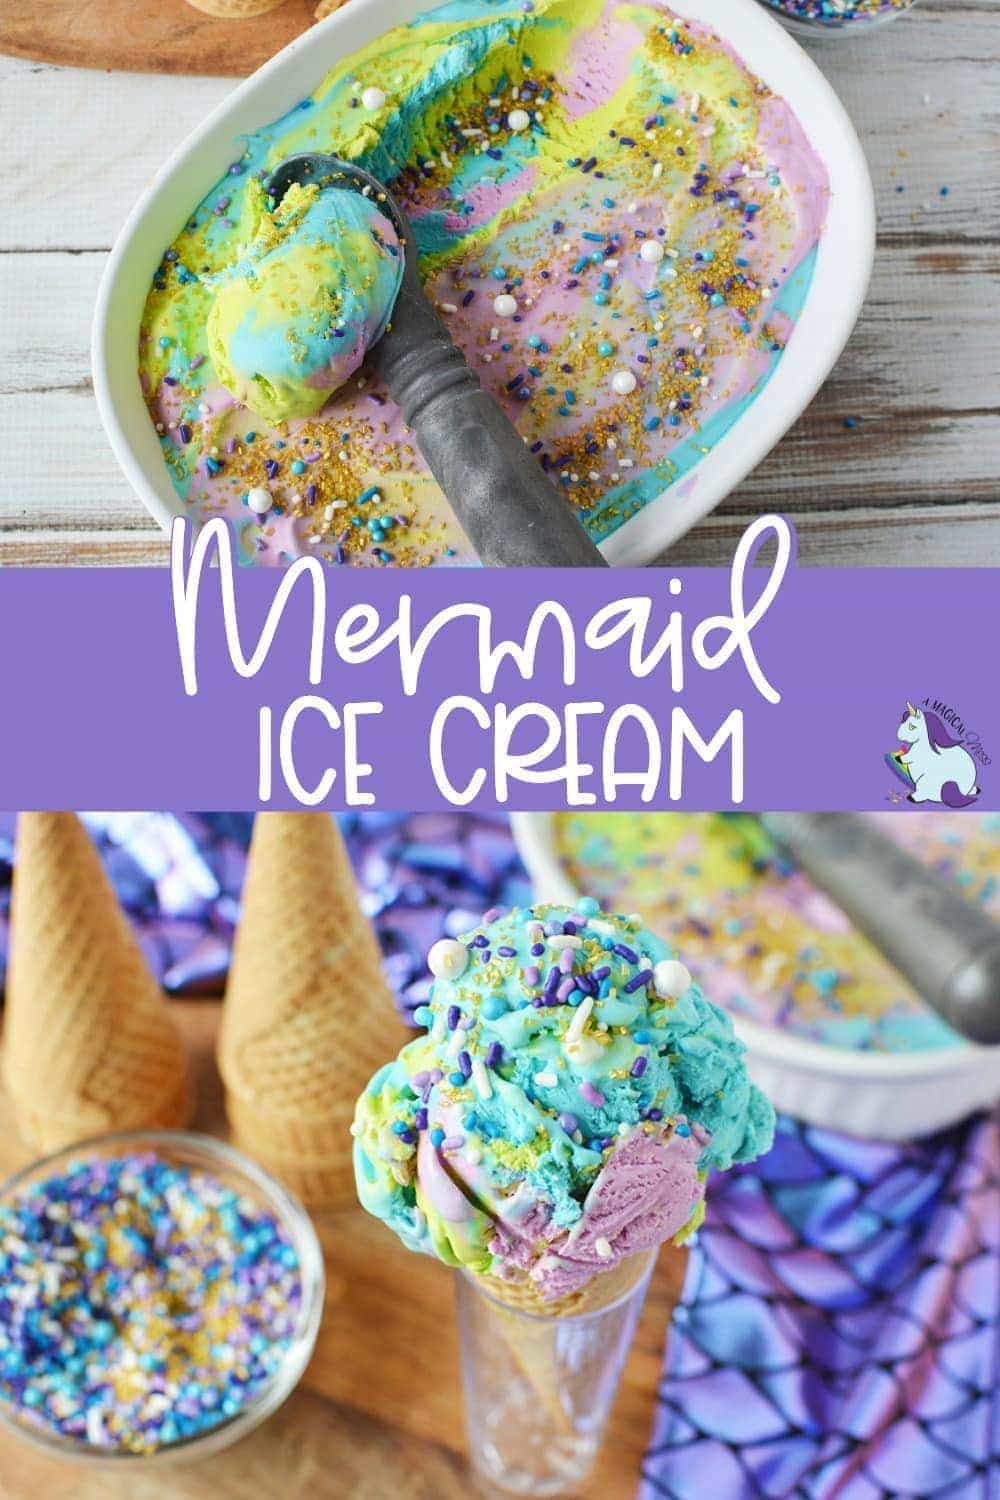
Homemade Mermaid Ice Cream Recipe
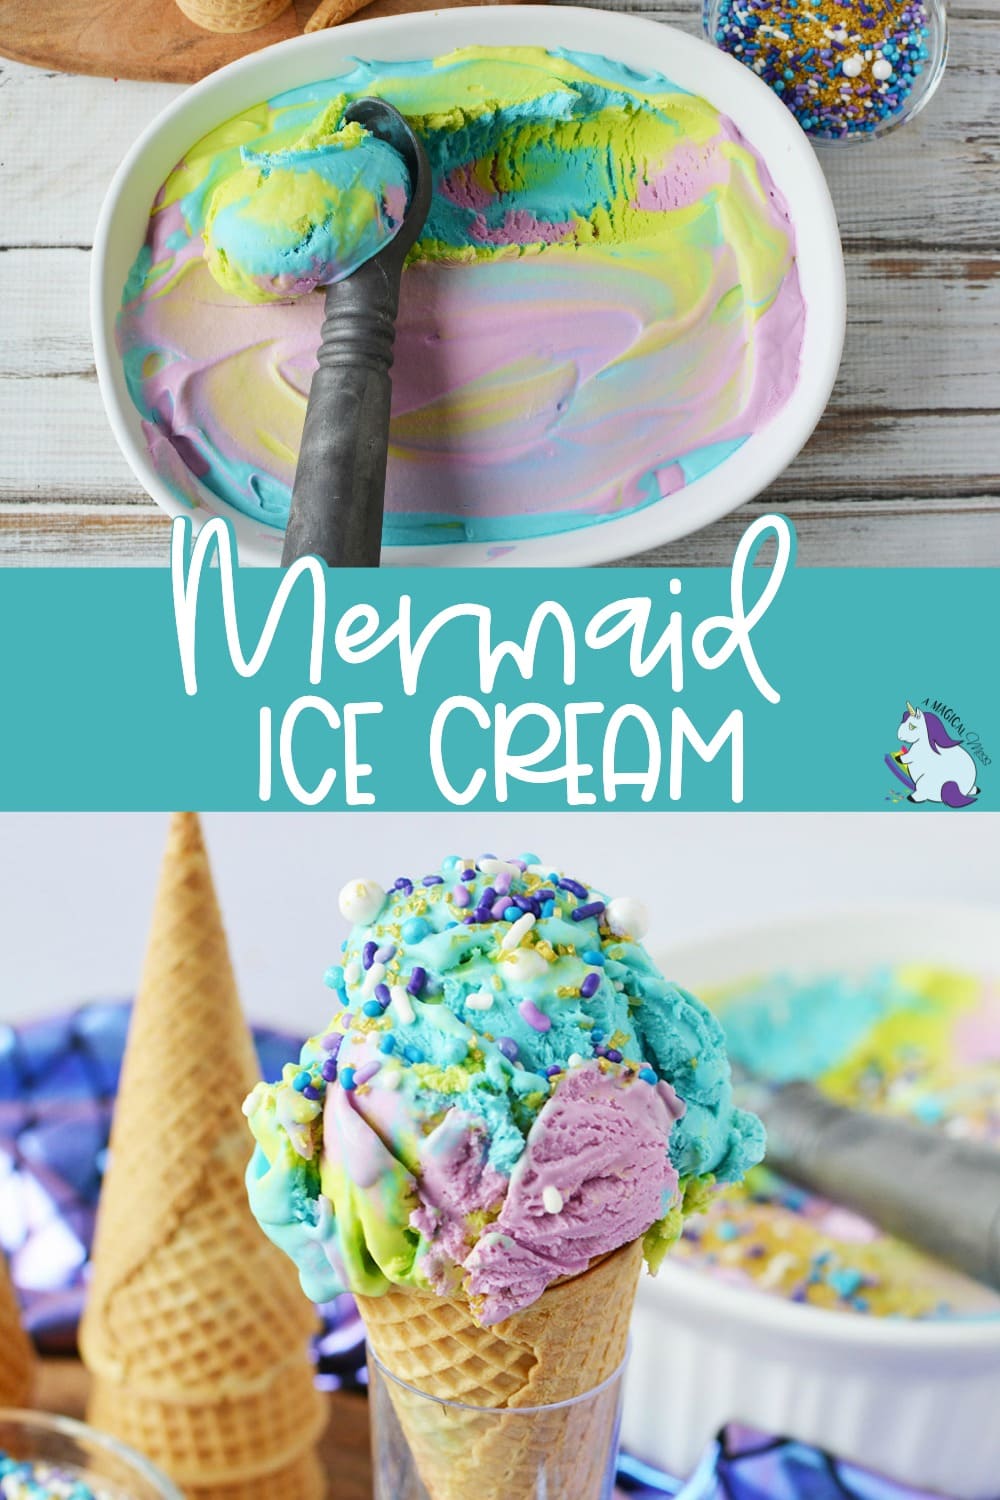
Mermaid ice cream is another magical treat to add to your collection.
Just like with the unicorn ice cream, this colorful dessert is extremely easy to make when you need a mermaid dessert.
Homemade Mermaid Ice Cream
Using just a few ingredients, you can make your own ice cream with mermaid-y colors for an under the sea themed party.
The ice cream itself is very sweet and each color has the same flavor.
Part of the magic here is keeping this recipe extremely simple.
You don’t need an ice cream maker or even anything that fancy at all to whip up this homemade ice cream to add to your dessert table.
Planning a themed party is a lot of work. Keeping a few simple recipes on hand is key to maintaining your sanity.
Make this homemade ice cream the day before or even the morning of your party.
It only takes 4-6 hours to freeze, so prepare the mixture and then work on all your other mermaid desserts while it hardens.
Can you tell I am typically a frazzled, last-minute mess and I am assuming you are too?
In any case, here is a simple ice cream recipe with colors fit for all the merpeople of the land!
Eight-year-old me wants to do an Ariel hair flip in the pool over this ocean swirly goodness.
Mermaid Ice Cream Ingredients
(Measurements are in the printable recipe card below)
- Heavy whipping cream
- Sweetened condensed milk
- Vanilla
- Blue, green, and violet food coloring
- Mermaid sprinkles
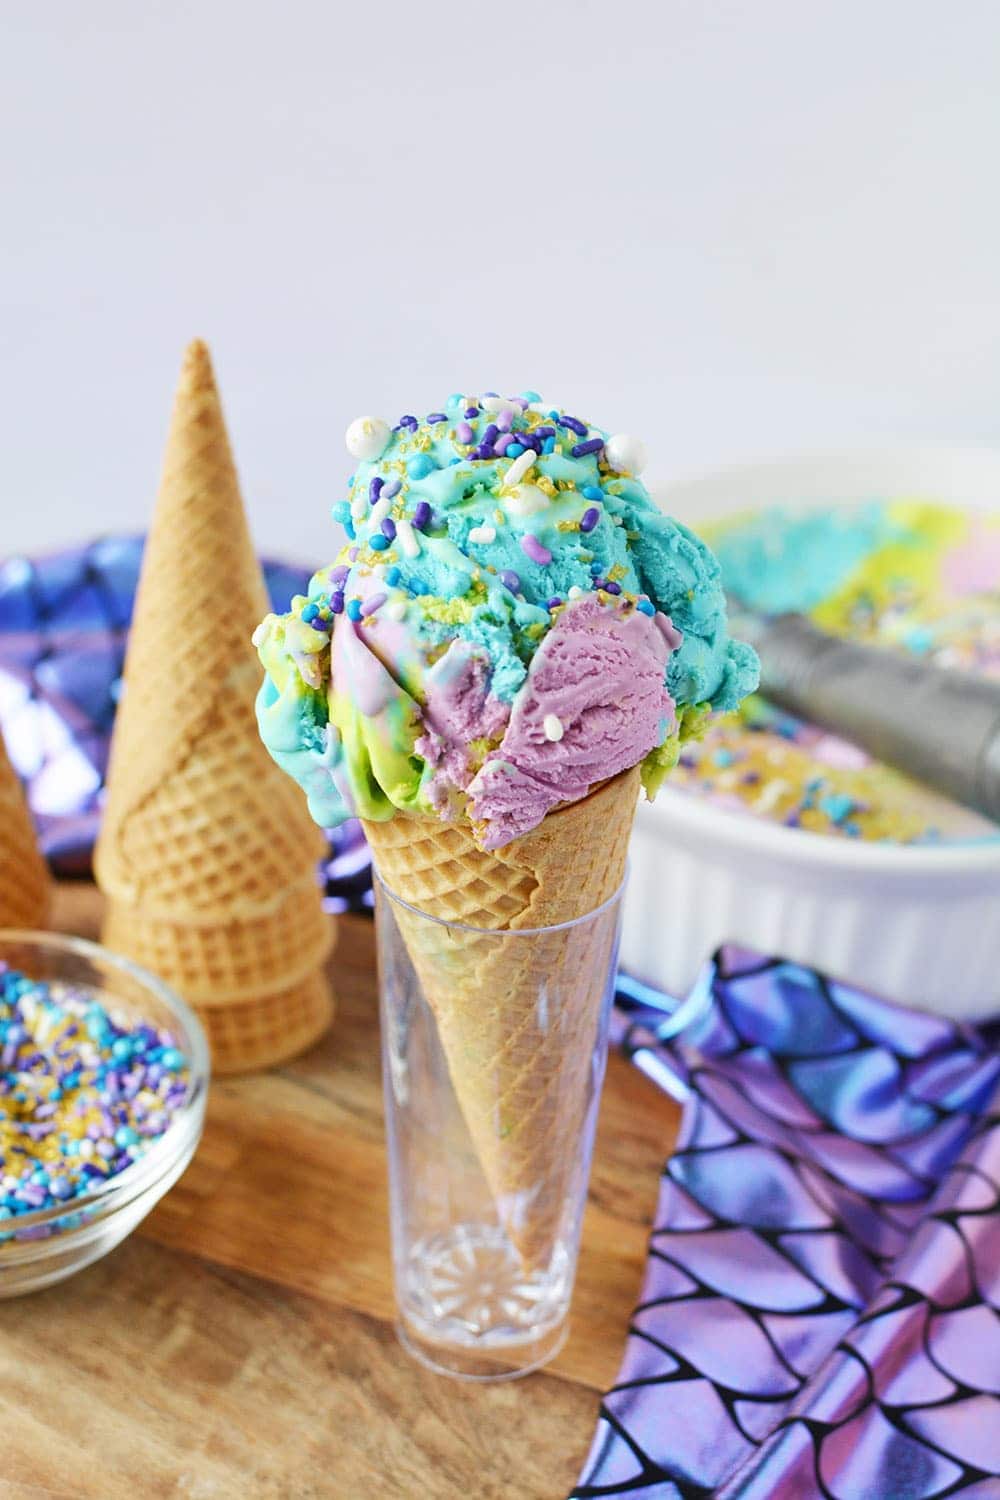
- Ice cream cones
How to make Mermaid Ice cream
Whip the cream and vanilla in a mixer on high until stiff peaks form.
Add sweetened condensed milk and whisk for another minute.
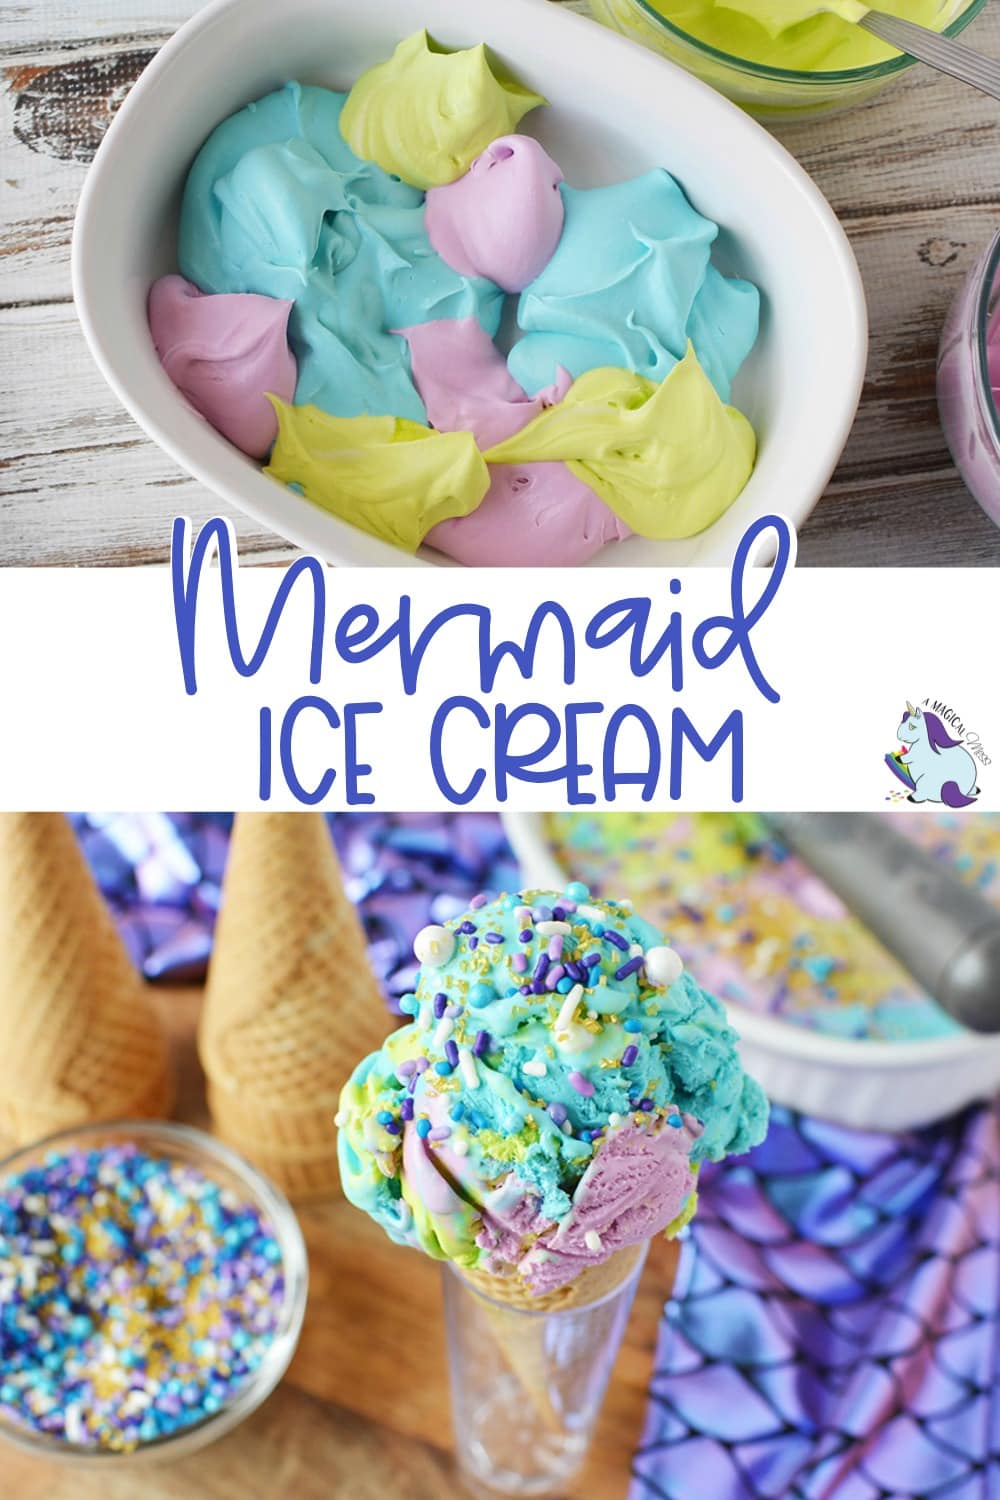
Divide the mixture into separate bowls. Use a larger bowl for the blue color.
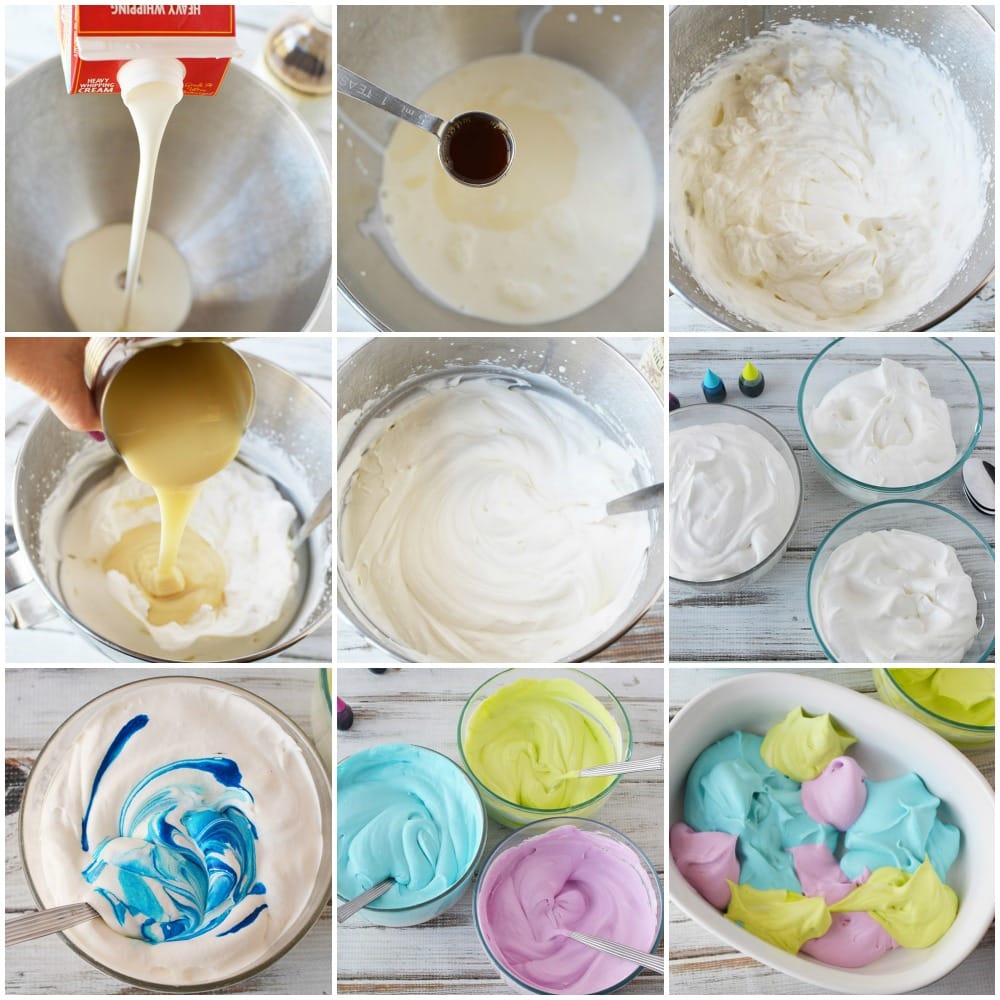
Add food coloring to each bowl to make blue, purple, and green.
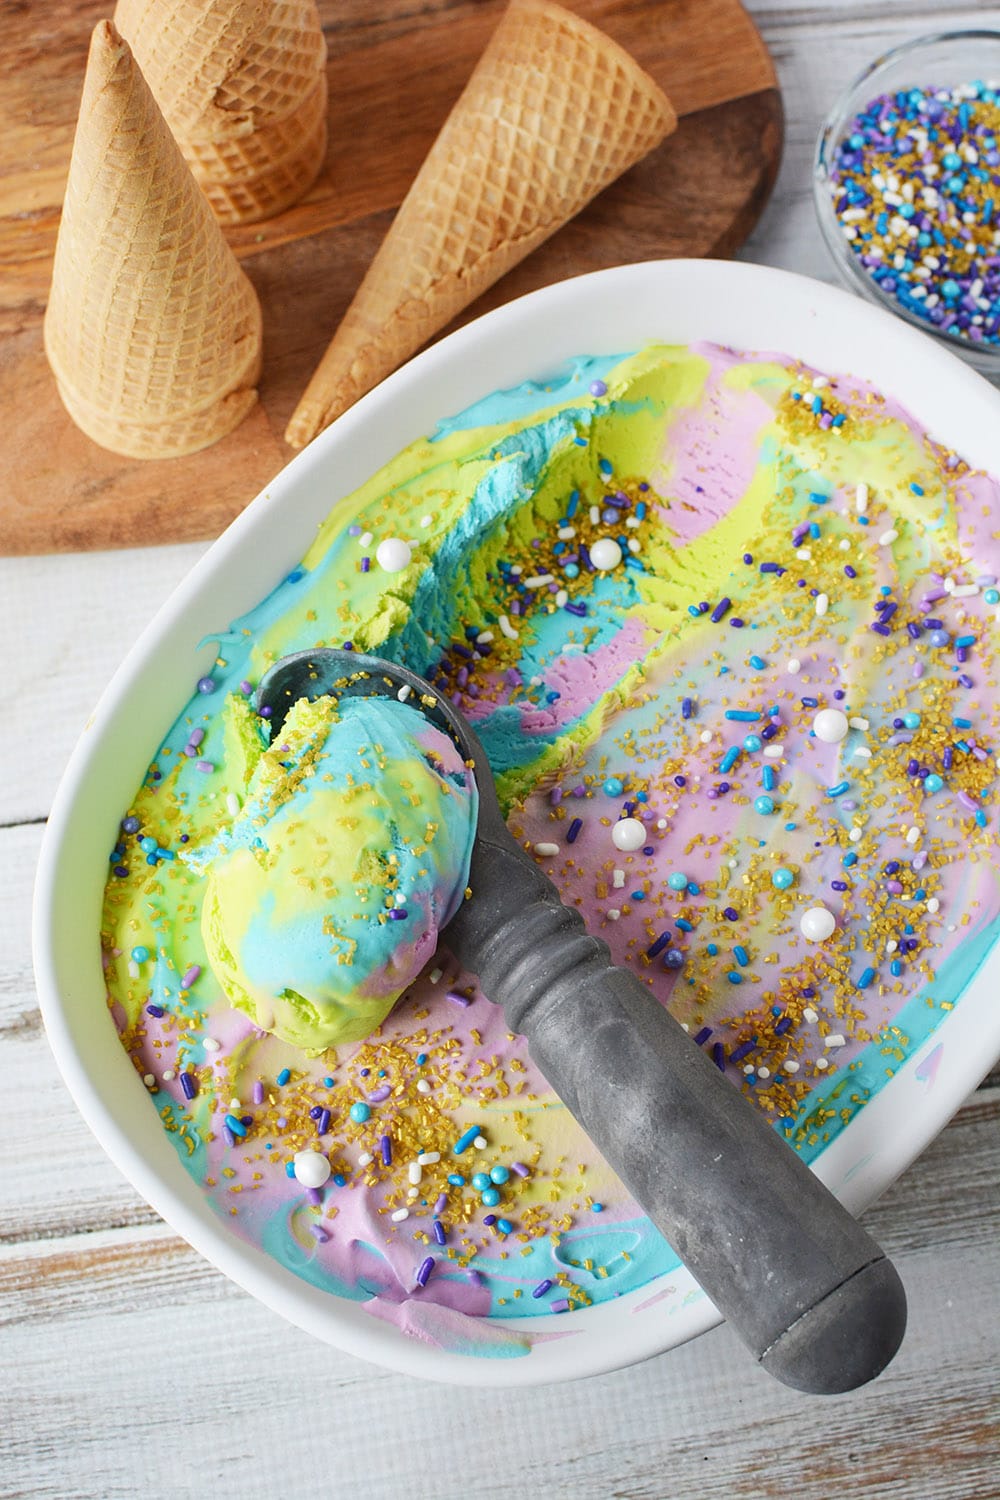
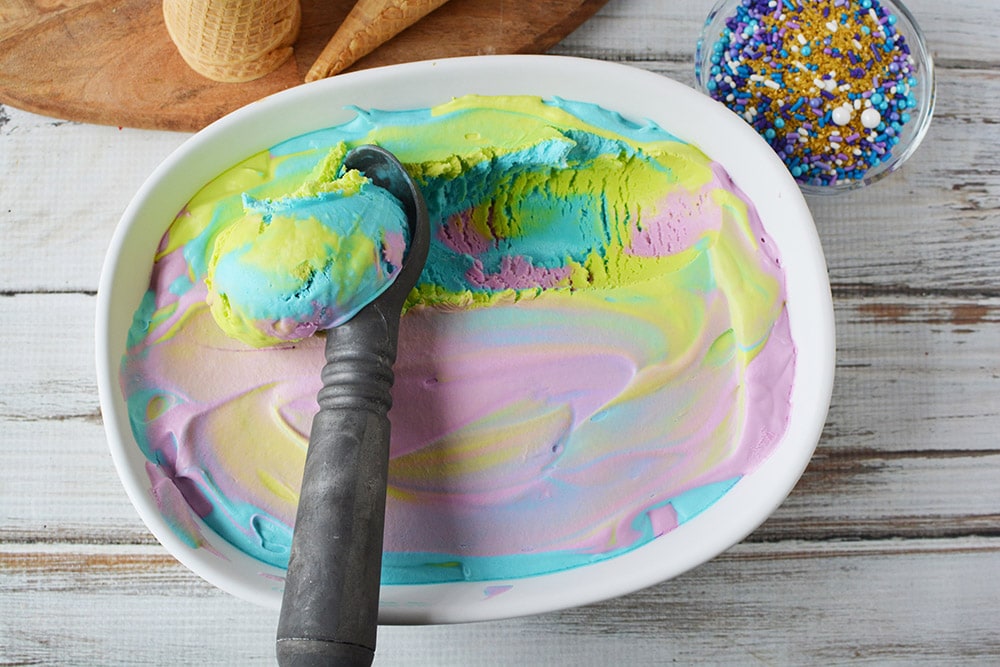
Place half of the blue into the container you use to make ice cream – a loaf pan, casserole dish, or insulated container for homemade ice cream.
Drop dollops of half of the green ice cream and the purple ice cream.
Add remaining colors of the mixture, layering to alternate all the colors.
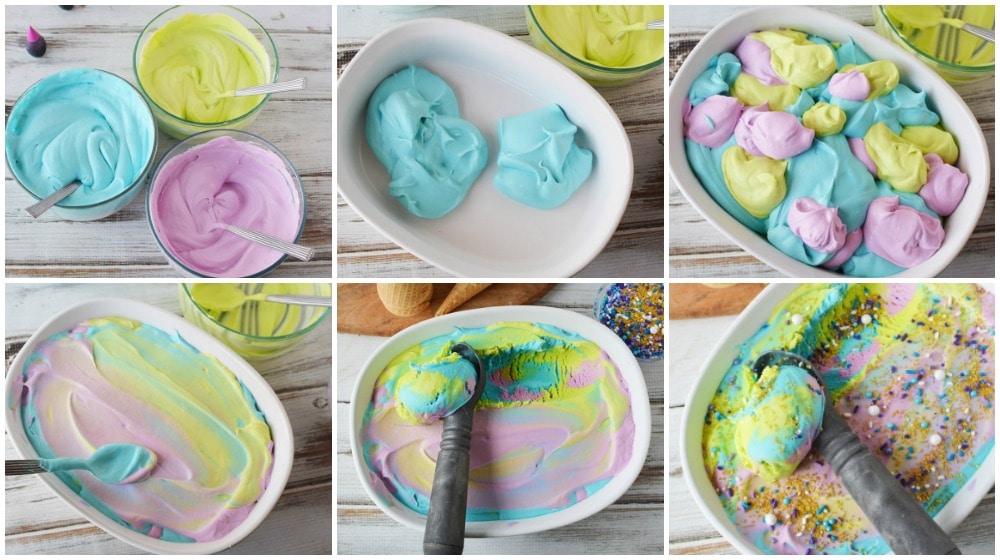
Tamp the dish down to remove air bubbles.
Smooth the top of the ice cream mixture with the back of a spoon.
Freeze for 4-6 hours or overnight.
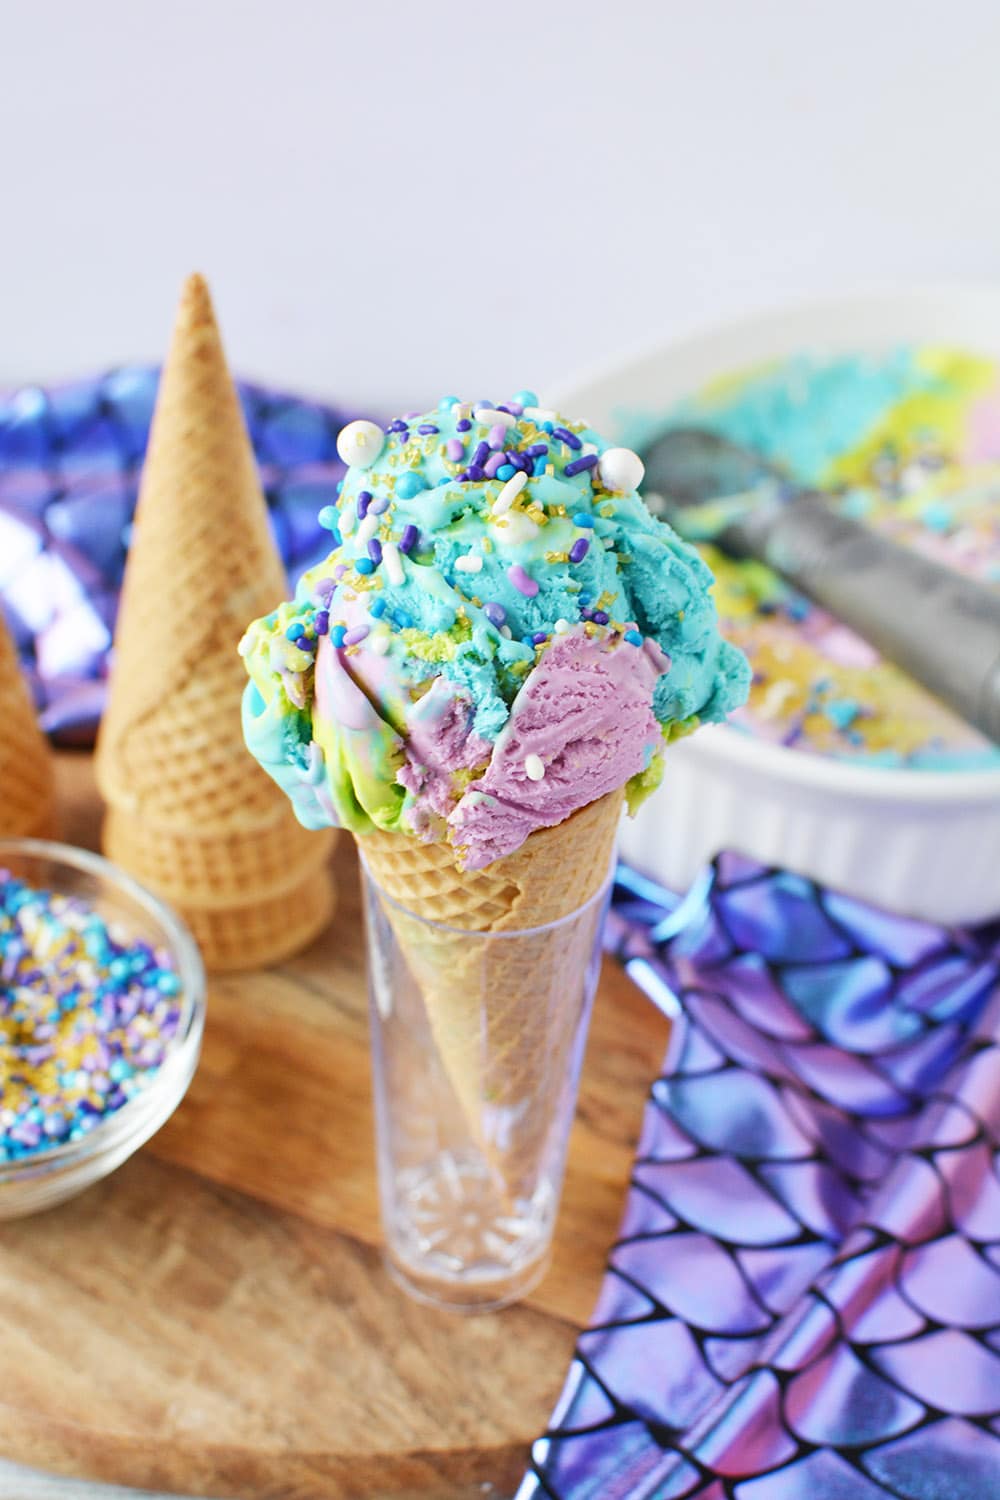
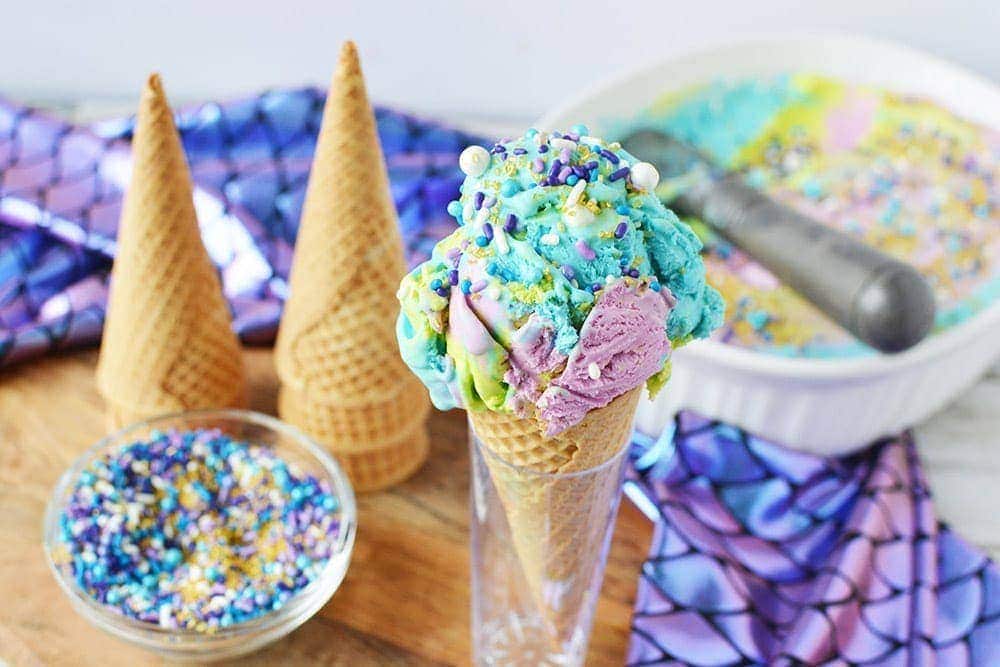
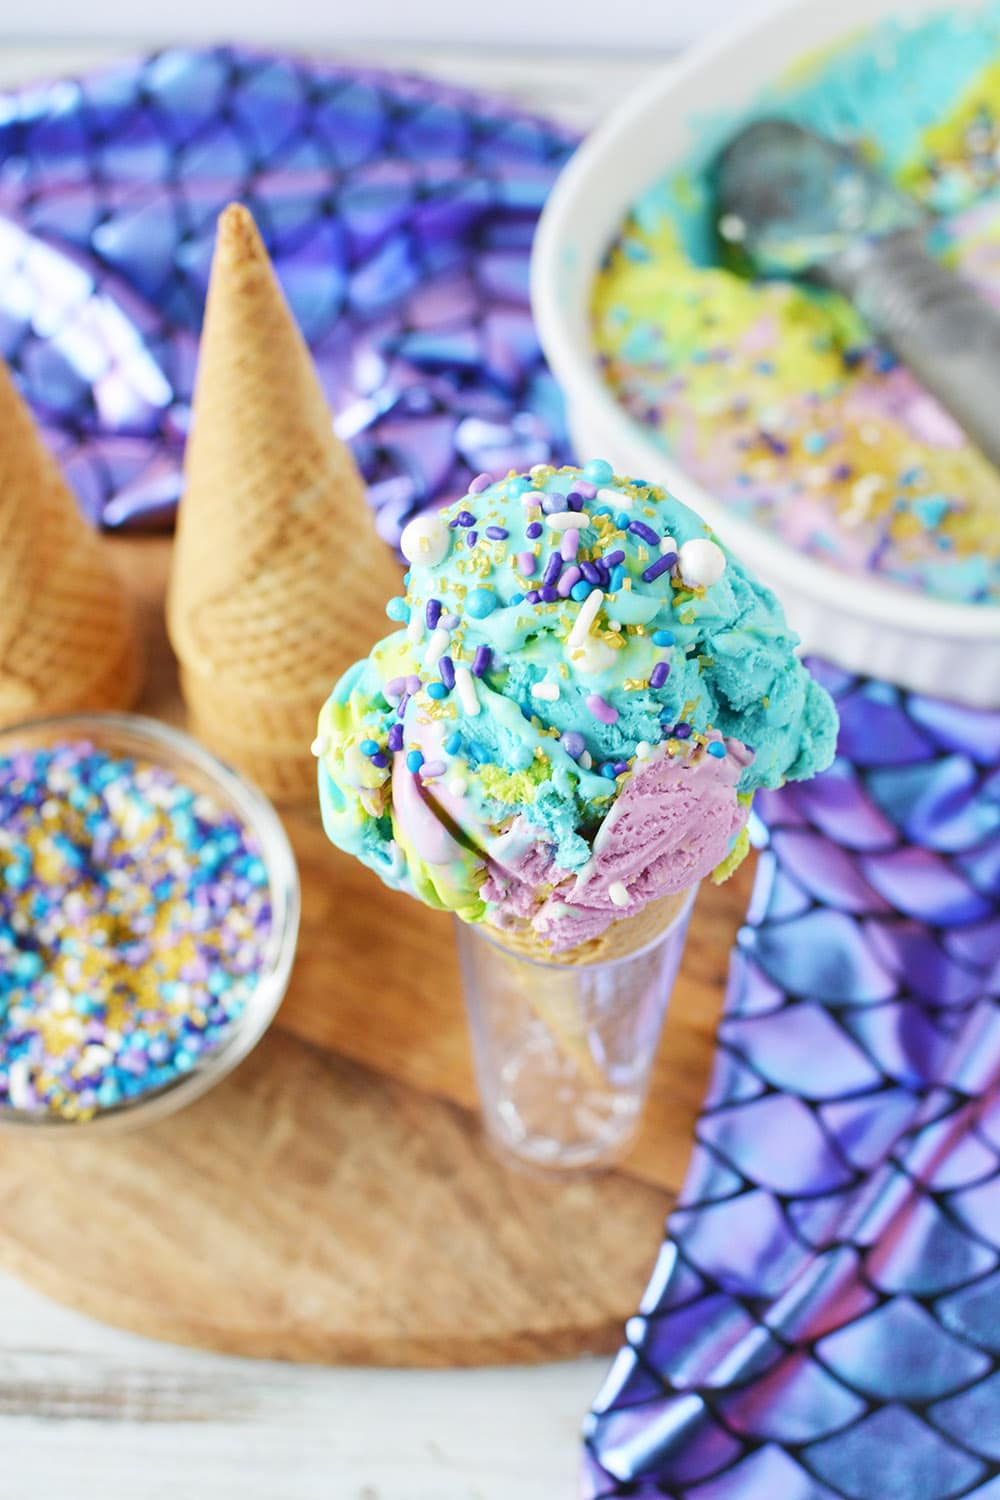
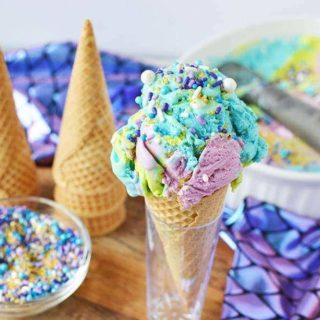
Top with mermaid sprinkles and serve.
Fantastical Mermaid Recipes
- No-bake Mermaid donut holes that are fun to decorate.
- Mermaid cookie cups that look like little tide pools.
- Swirly ocean colored Mermaid cupcakes.
- Mermaid cookie pizza for a unique and tasty dessert.
- Quick and easy Mermaid candy fudge.
- Sparkly Mermaid bark candy that the kids can have fun decorating.
- Mermaid party popcorn that’s perfect for goody bags or movie night snacking.
Mermaid Ice Cream
Equipment
This post contains affiliate links. As an Amazon Associate, I earn from qualifying purchases at no extra cost to you.
Ingredients
- 2 cup heavy whipping cream
- 14 oz sweetened condensed milk
- 1 tsp vanilla extract
- neon blue food coloring
- Neon green food coloring
- neon purple food coloring
- Sweet Shop mermaid sprinkle mix
Instructions
- Add whipping cream and vanilla to a mixer and whisk on high speed until stiff peaks form, about 2-3 minutes. Add sweetened condensed milk and continue to whisk for one more minute, scraping down sides of the bowl halfway through the mixing.2 cup heavy whipping cream, 14 oz sweetened condensed milk, 1 tsp vanilla extract
- Divide mixture into separate bowls. Use a larger bowl to make more blue ice cream and two smaller bowls for purple and green. Add food coloring to each bowl and mix well.neon blue food coloring, Neon green food coloring, neon purple food coloring
- Place half of the blue into a loaf pan or casserole dish and spoon dollops of half of the green and purple. Add remaining blue and green and purple. Tamp the dish to remove air bubbles. Smooth the top with the back of a spoon.
- Freeze for 4-6 hours or overnight.
- Serve topped with mermaid sprinklesSweet Shop mermaid sprinkle mix
Video
Nutrition
Are you planning an under the sea themed party? If not, you can also try this birthday ice cream recipe.
For more creative ideas, see how my sister threw an epic ocean themed party for my niece.
Don’t forget to subscribe to the blog for more magical desserts like this one.
Let me know if you make this mermaid ice cream!
I had no idea your recipe would be so simple! This would be perfect for a party!
what a fun treat to make for the kids. They love colorful dishes.
This looks easy and adaptable to other themes, too. Mixing colors is always fun – going to try this for sure. And, thanks for the homemade ice cream containers link. Might need a few!
You can definitely play around with all the colors!! Yes, if you make a lot of ice cream, those containers are awesome for storing and stacking. 🙂
This is so fun – I love homemade ice cream but this colorful version is just the best!
Thank you, Monica! Glad you like it!